Rectify Your iPhone's Constant 'SOS' Alert: Discover 6 Proven Methods

Rectify Your iPhone’s Constant ‘SOS’ Alert: Discover 6 Proven Methods
If the top of your iPhone shows “SOS Only” where it normally shows your cell service reception, there are a few issues that could be going on. For one, you might not have coverage at your current location. Either your carrier doesn’t offer cell service at your coordinates, or you’re blocked by a structure that the signal can’t penetrate.
If neither of those is the culprit, there are several troubleshooting steps you can try to fix this problem. So, let’s take a look.
1. Turn Cellular Data Off and On
Your iPhone’s cellular data may not be working properly . If that’s the case, sometimes the best fix is the easiest fix: turning it off and on again.
Close
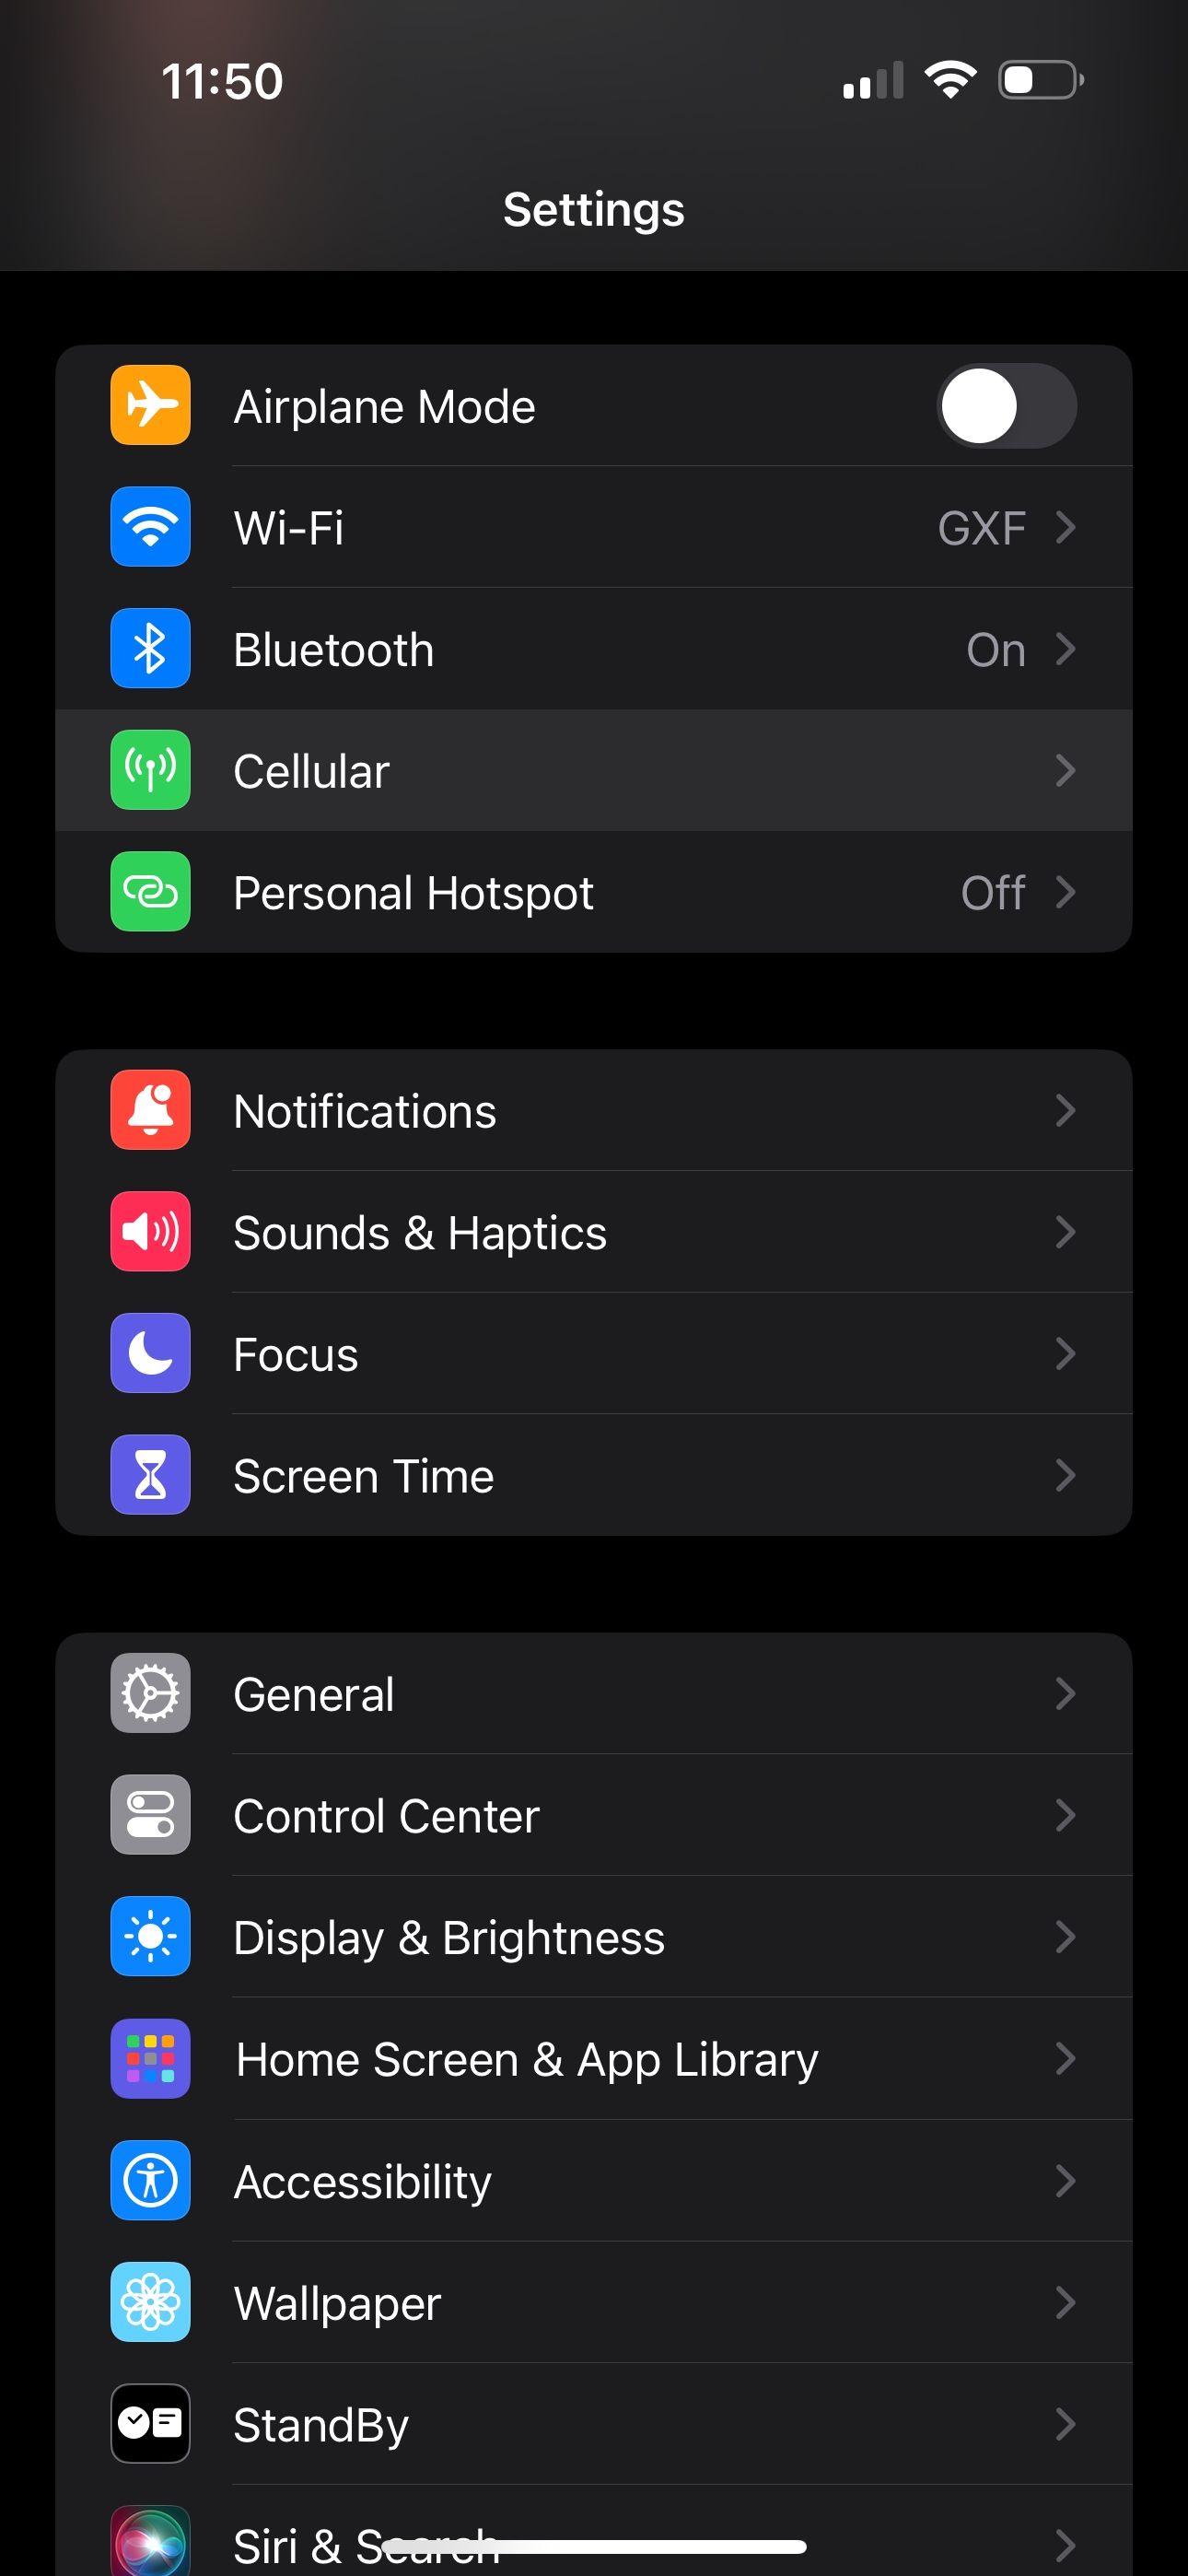
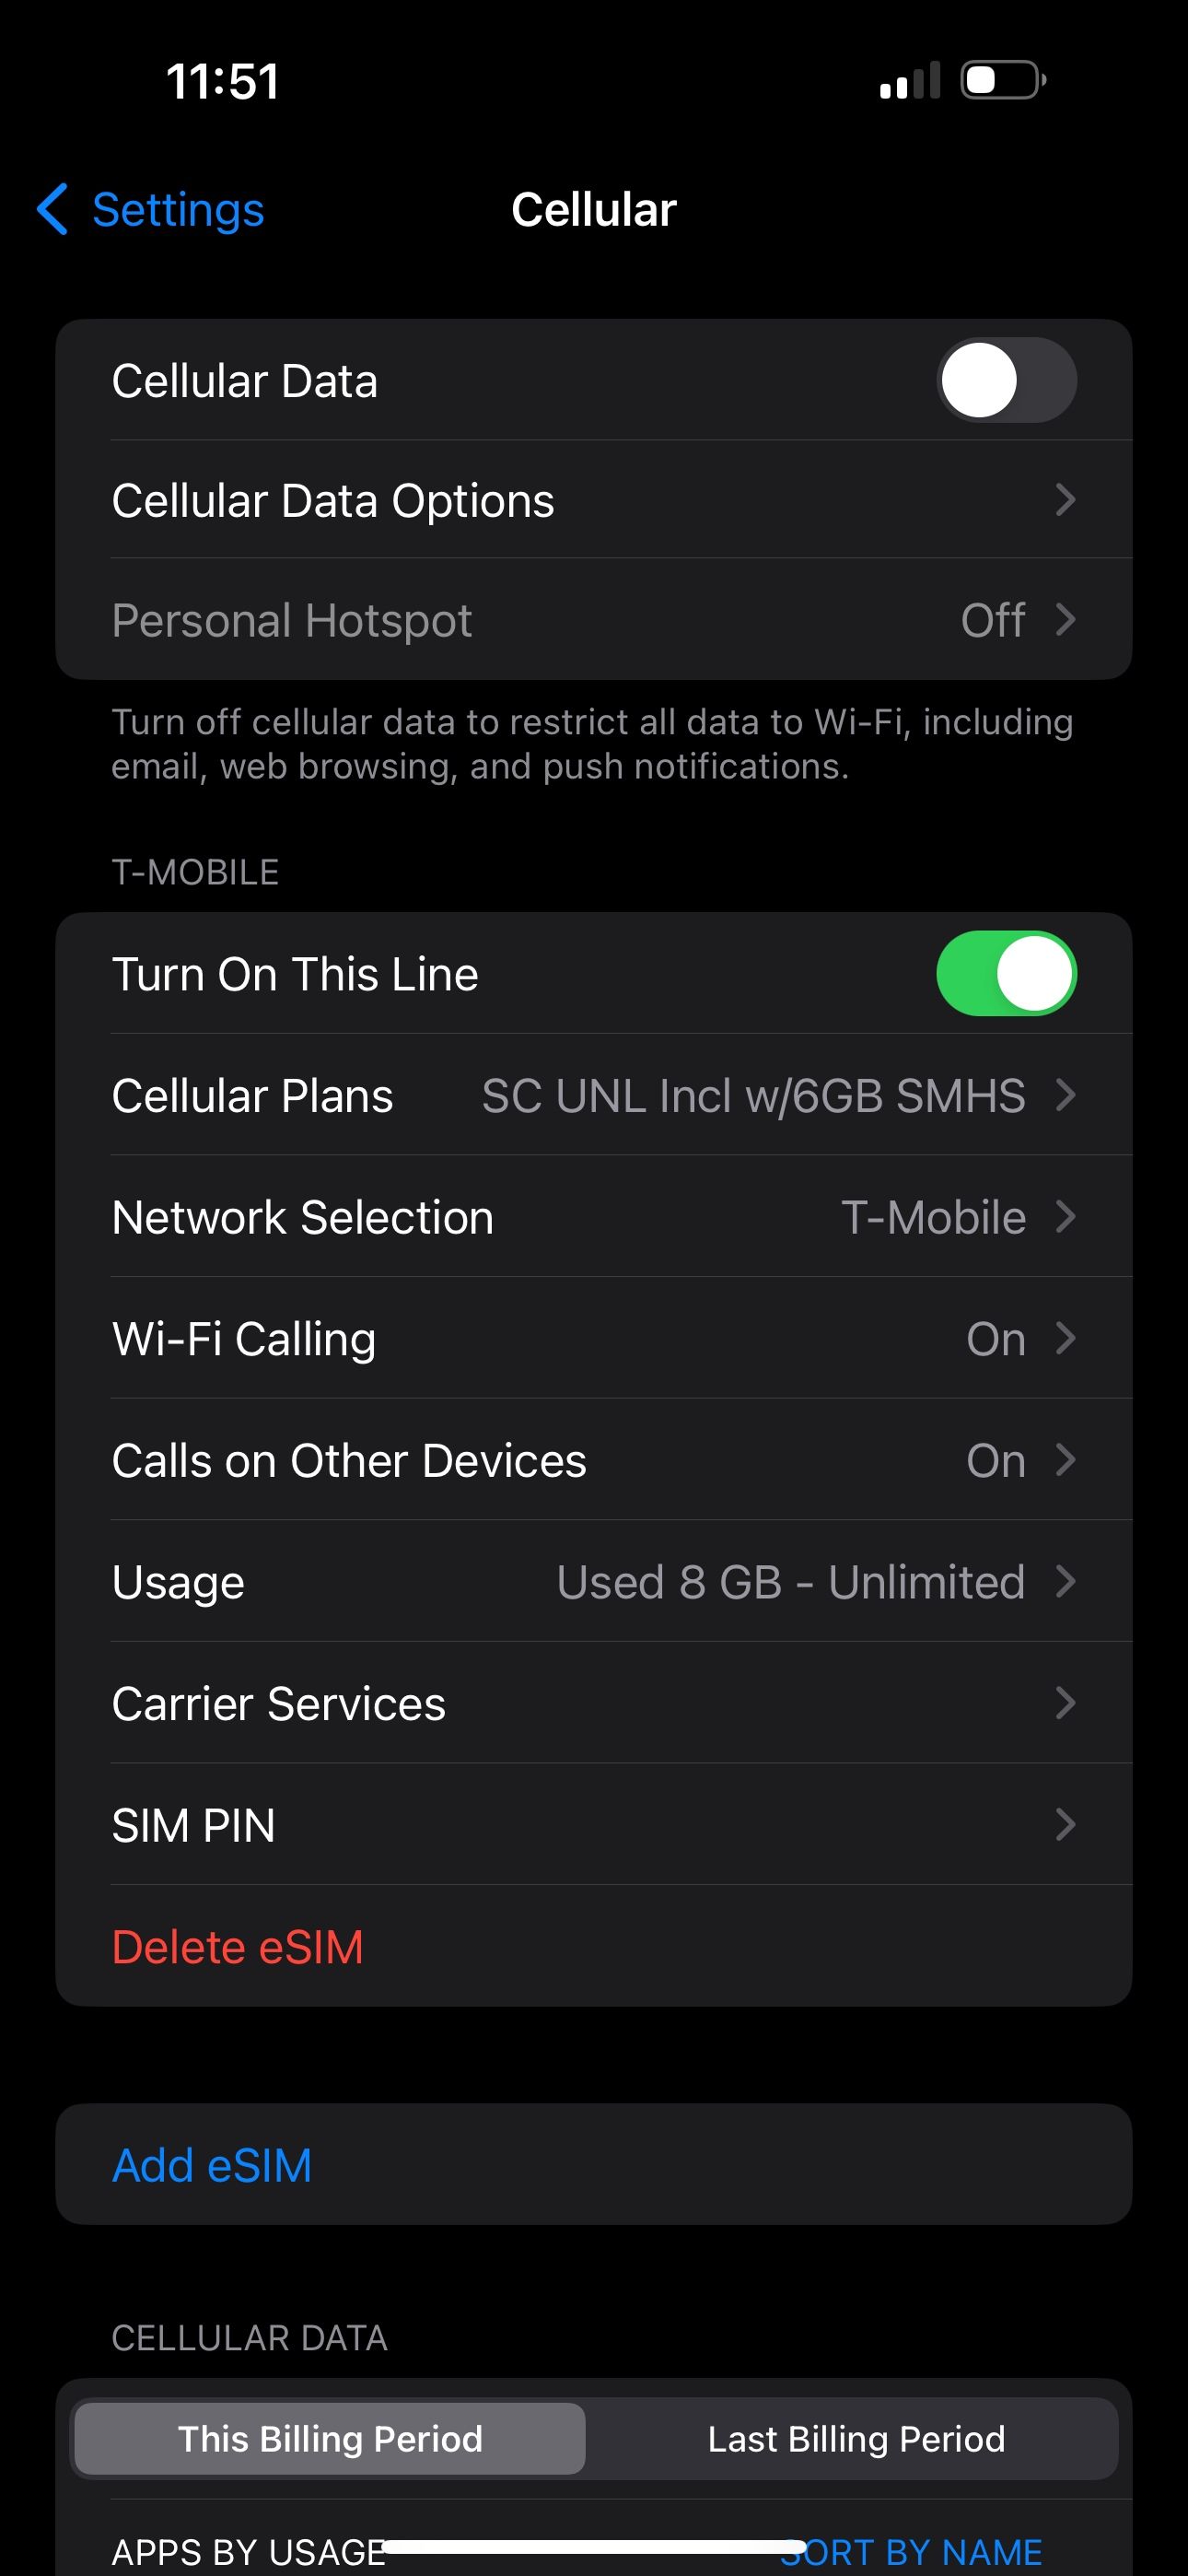
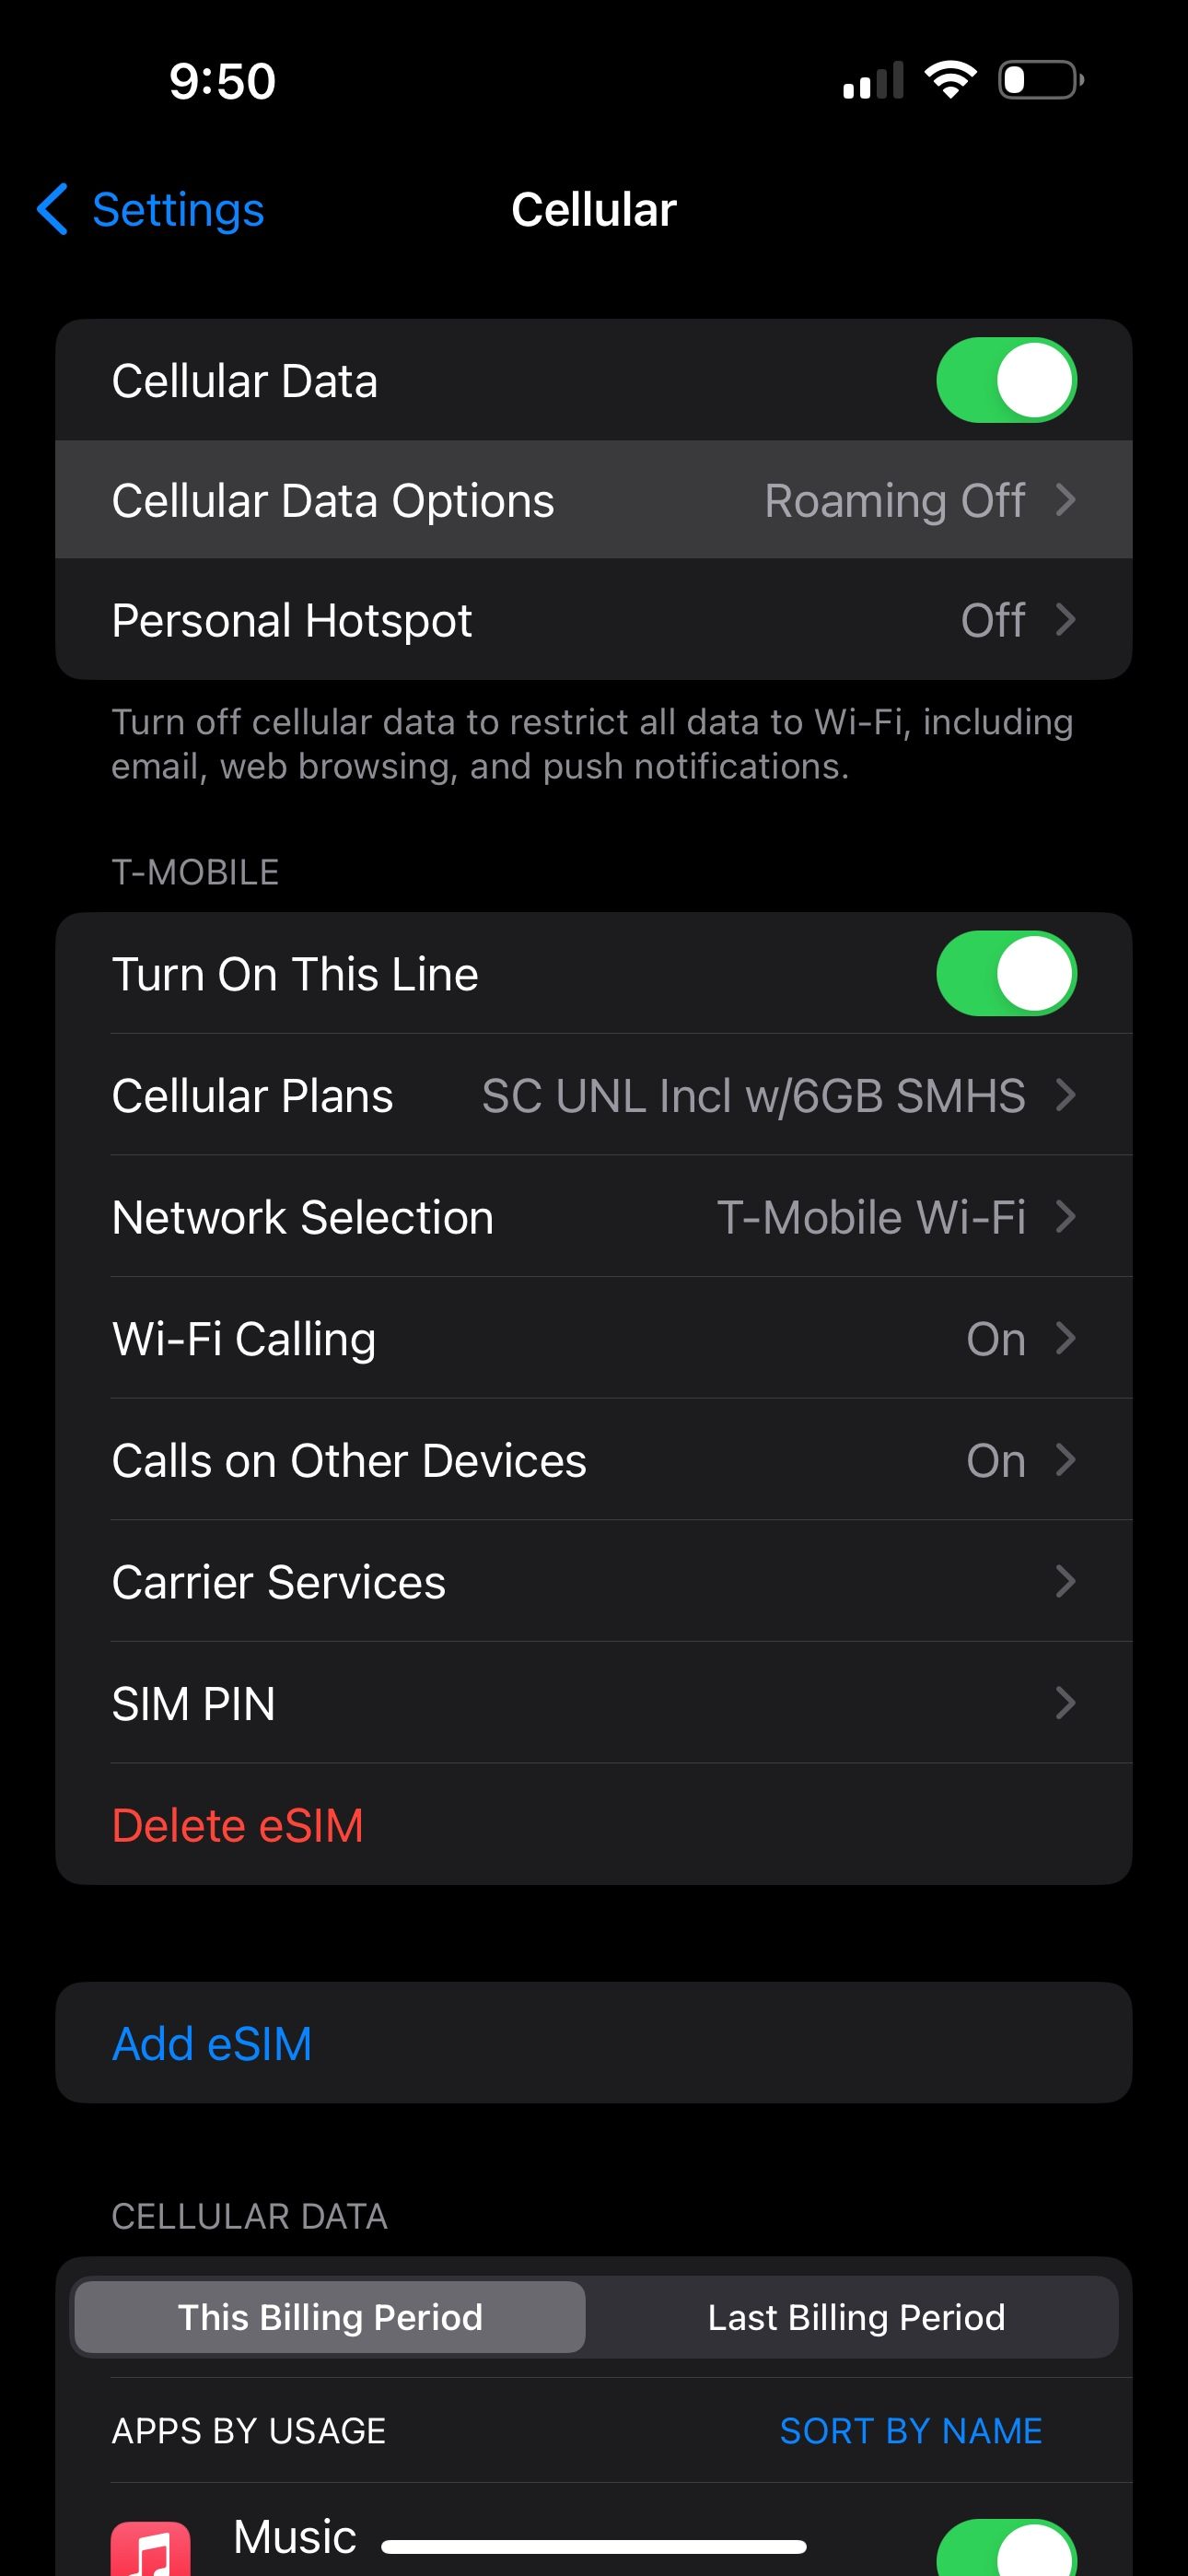
Head intoSettings > Cellular . It should be already on, so turn theCellular Data switch off. Give it a few seconds, then turnCellular Data back on. It may have just needed a quick reset, but if there is still no luck, move on to our next suggestion.
2. Enable Data Roaming
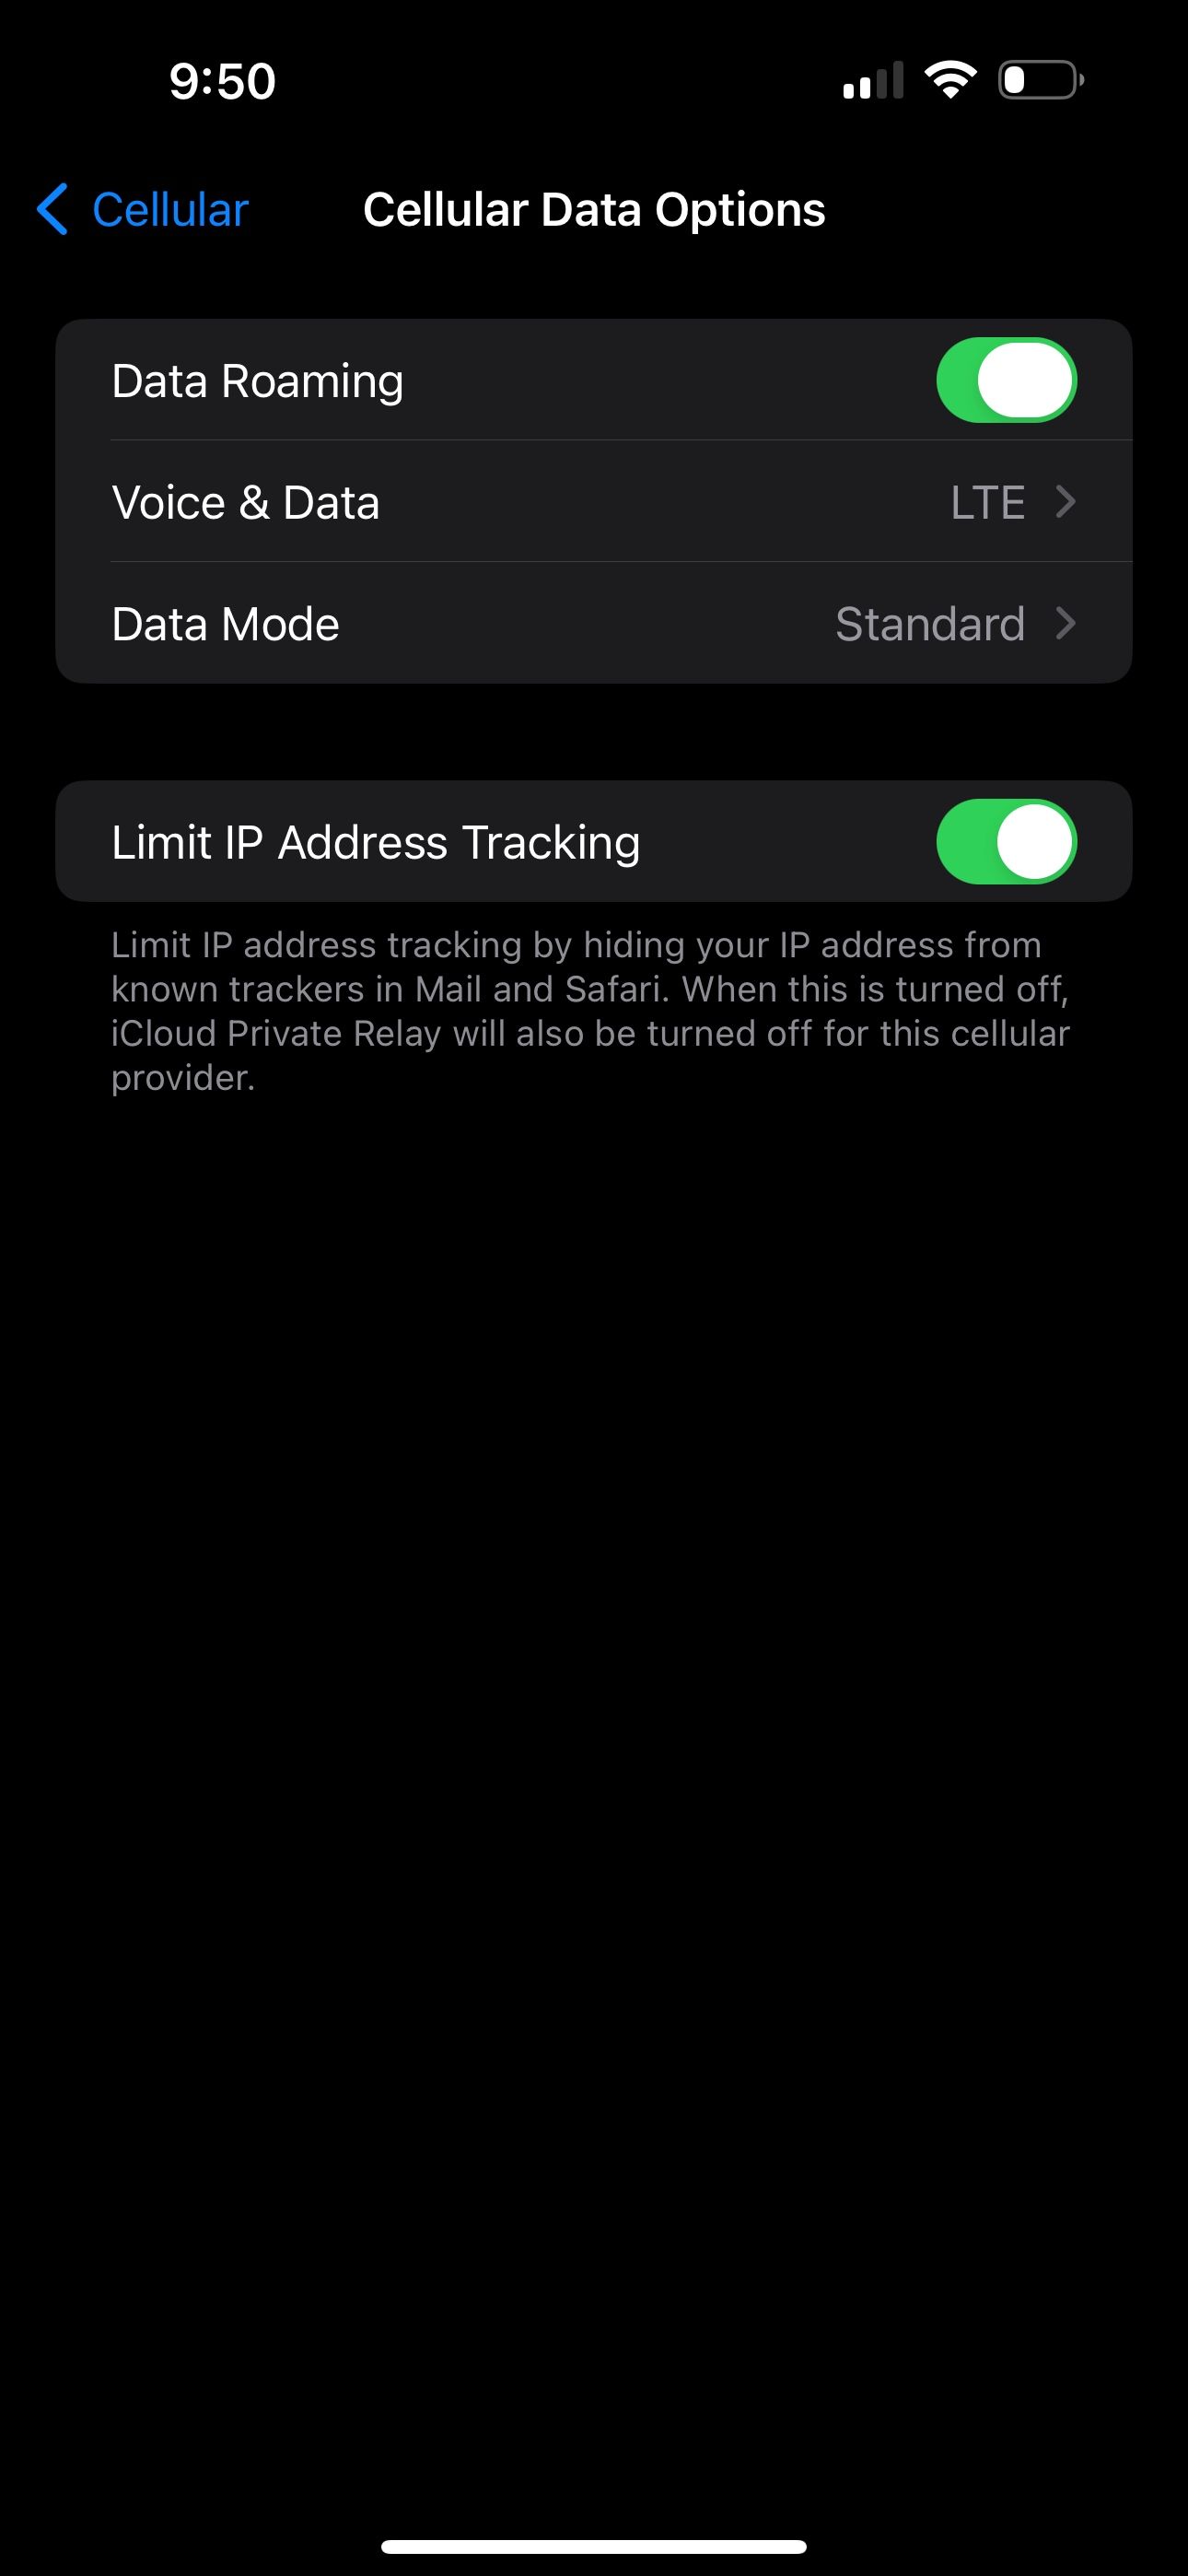
You may need to turn Data Roaming on, especially if you’re traveling internationally. This allows your iPhone to connect to another network in a different country without having to sign up for a new service. Beware that turning this on can come with additional fees on your phone bill.
Close
To enable Data Roaming on your iPhone, go toSettings > Cellular > Cellular Data Options . Then, toggle on theData Roaming switch.
3. Switch to LTE
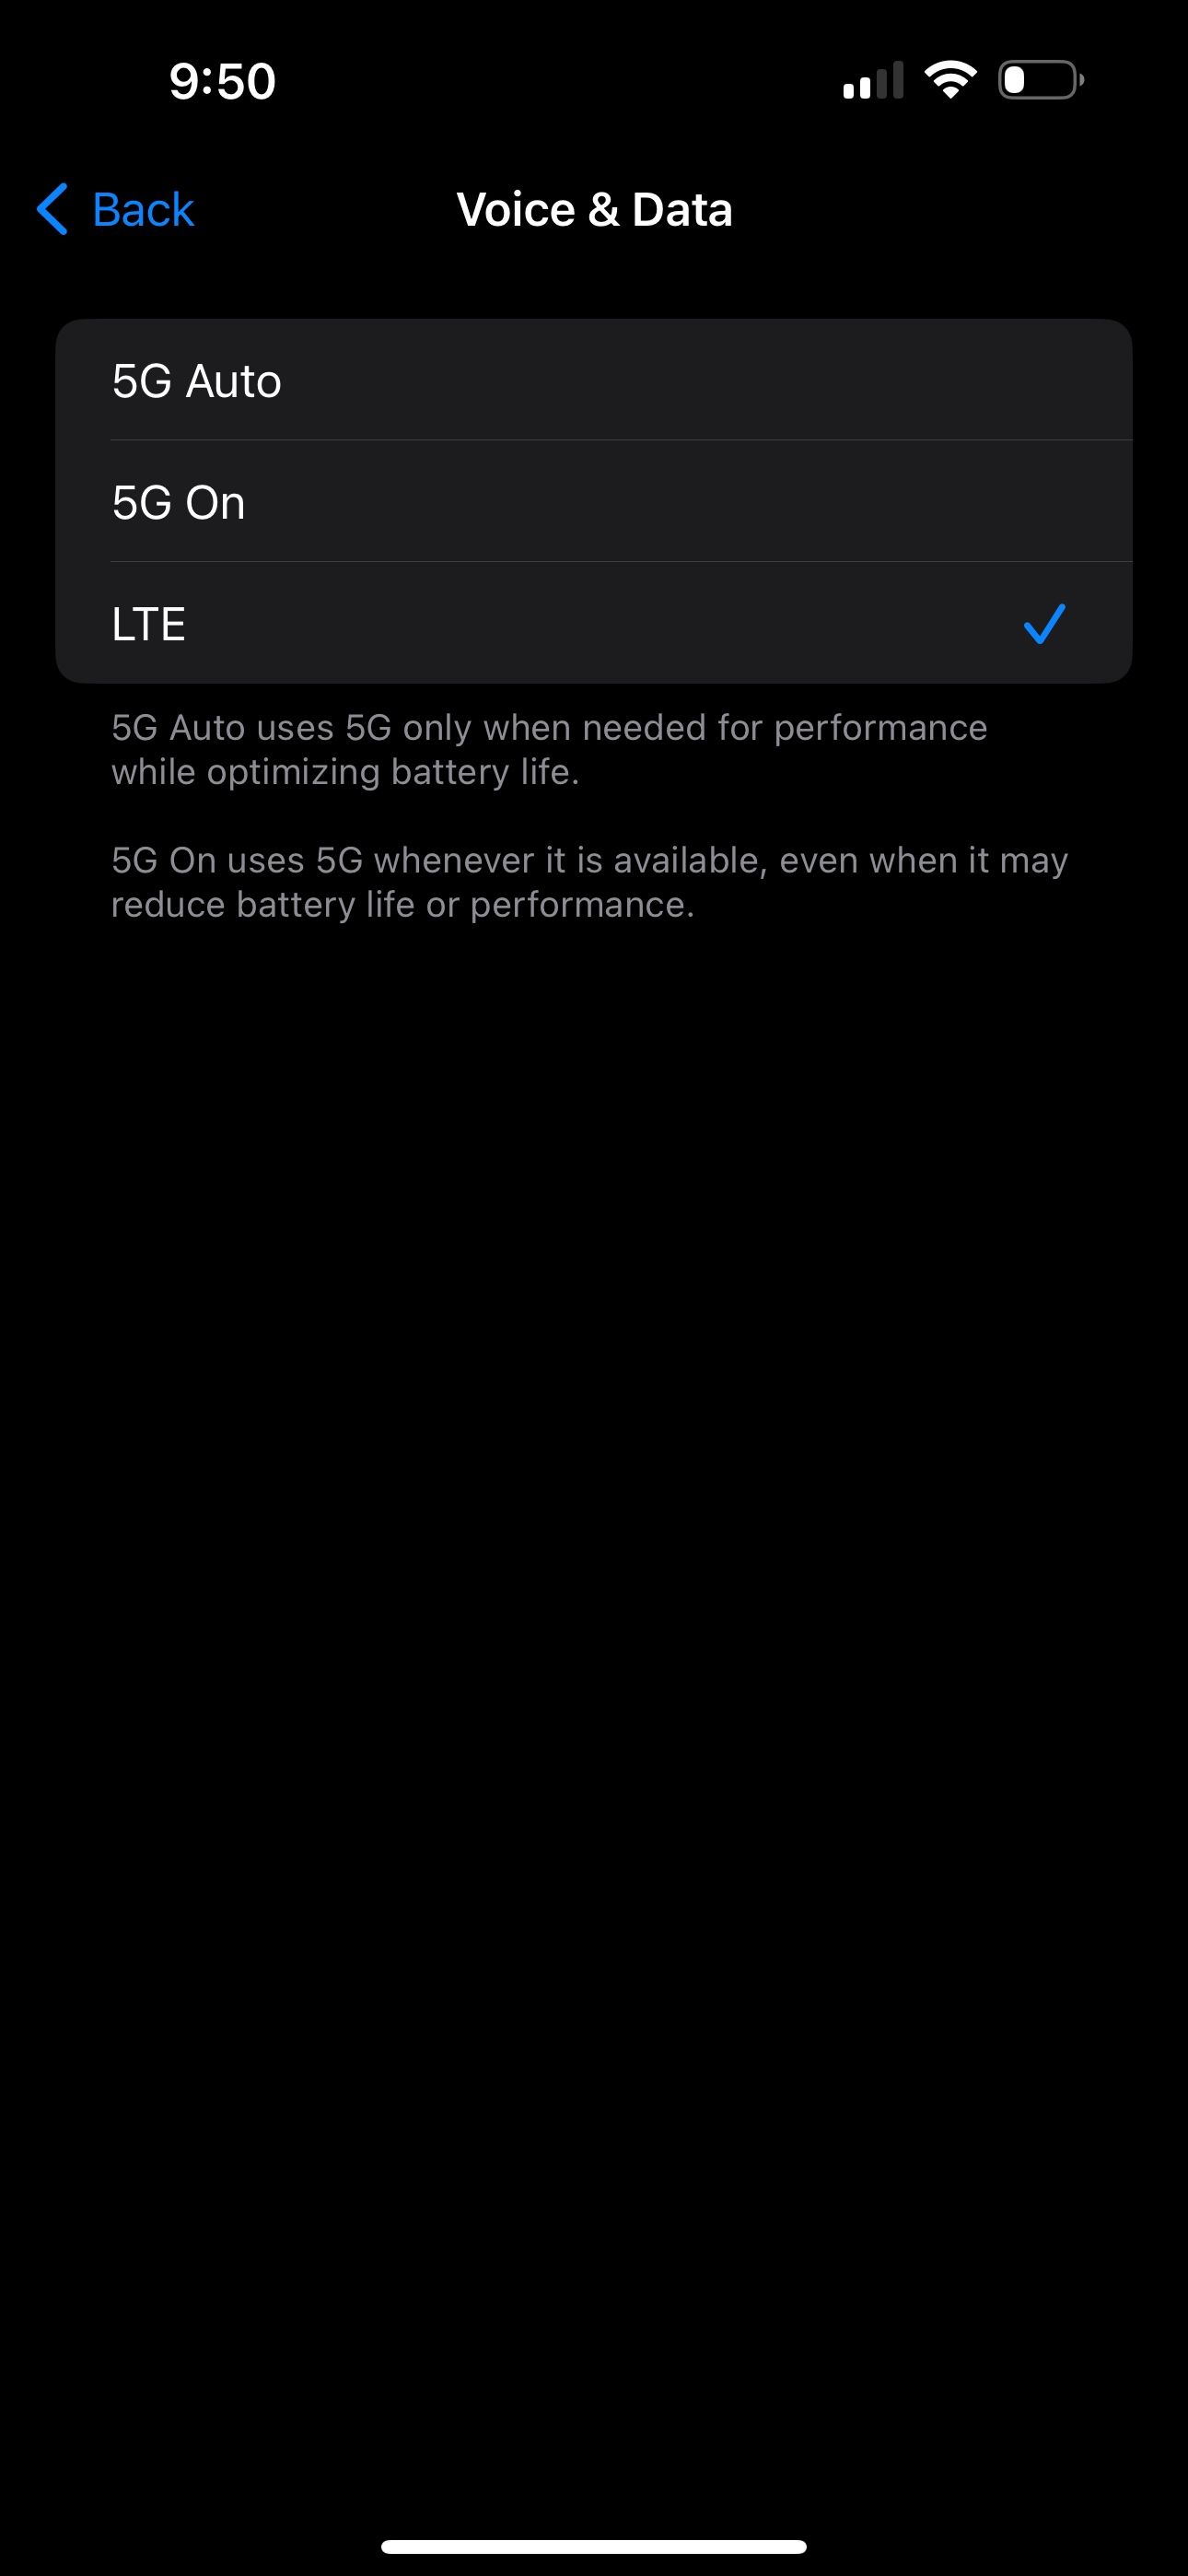
Your iPhone may have trouble picking up a specific type of cellular data, especially 5G. While 5G coverage has rapidly expanded over the past several years, LTE still blankets a larger portion of the United States. If your iPhone is set to receive 5G in a location where it’s unavailable, you may need to disable 5G on your device and fall back on another option.

Close
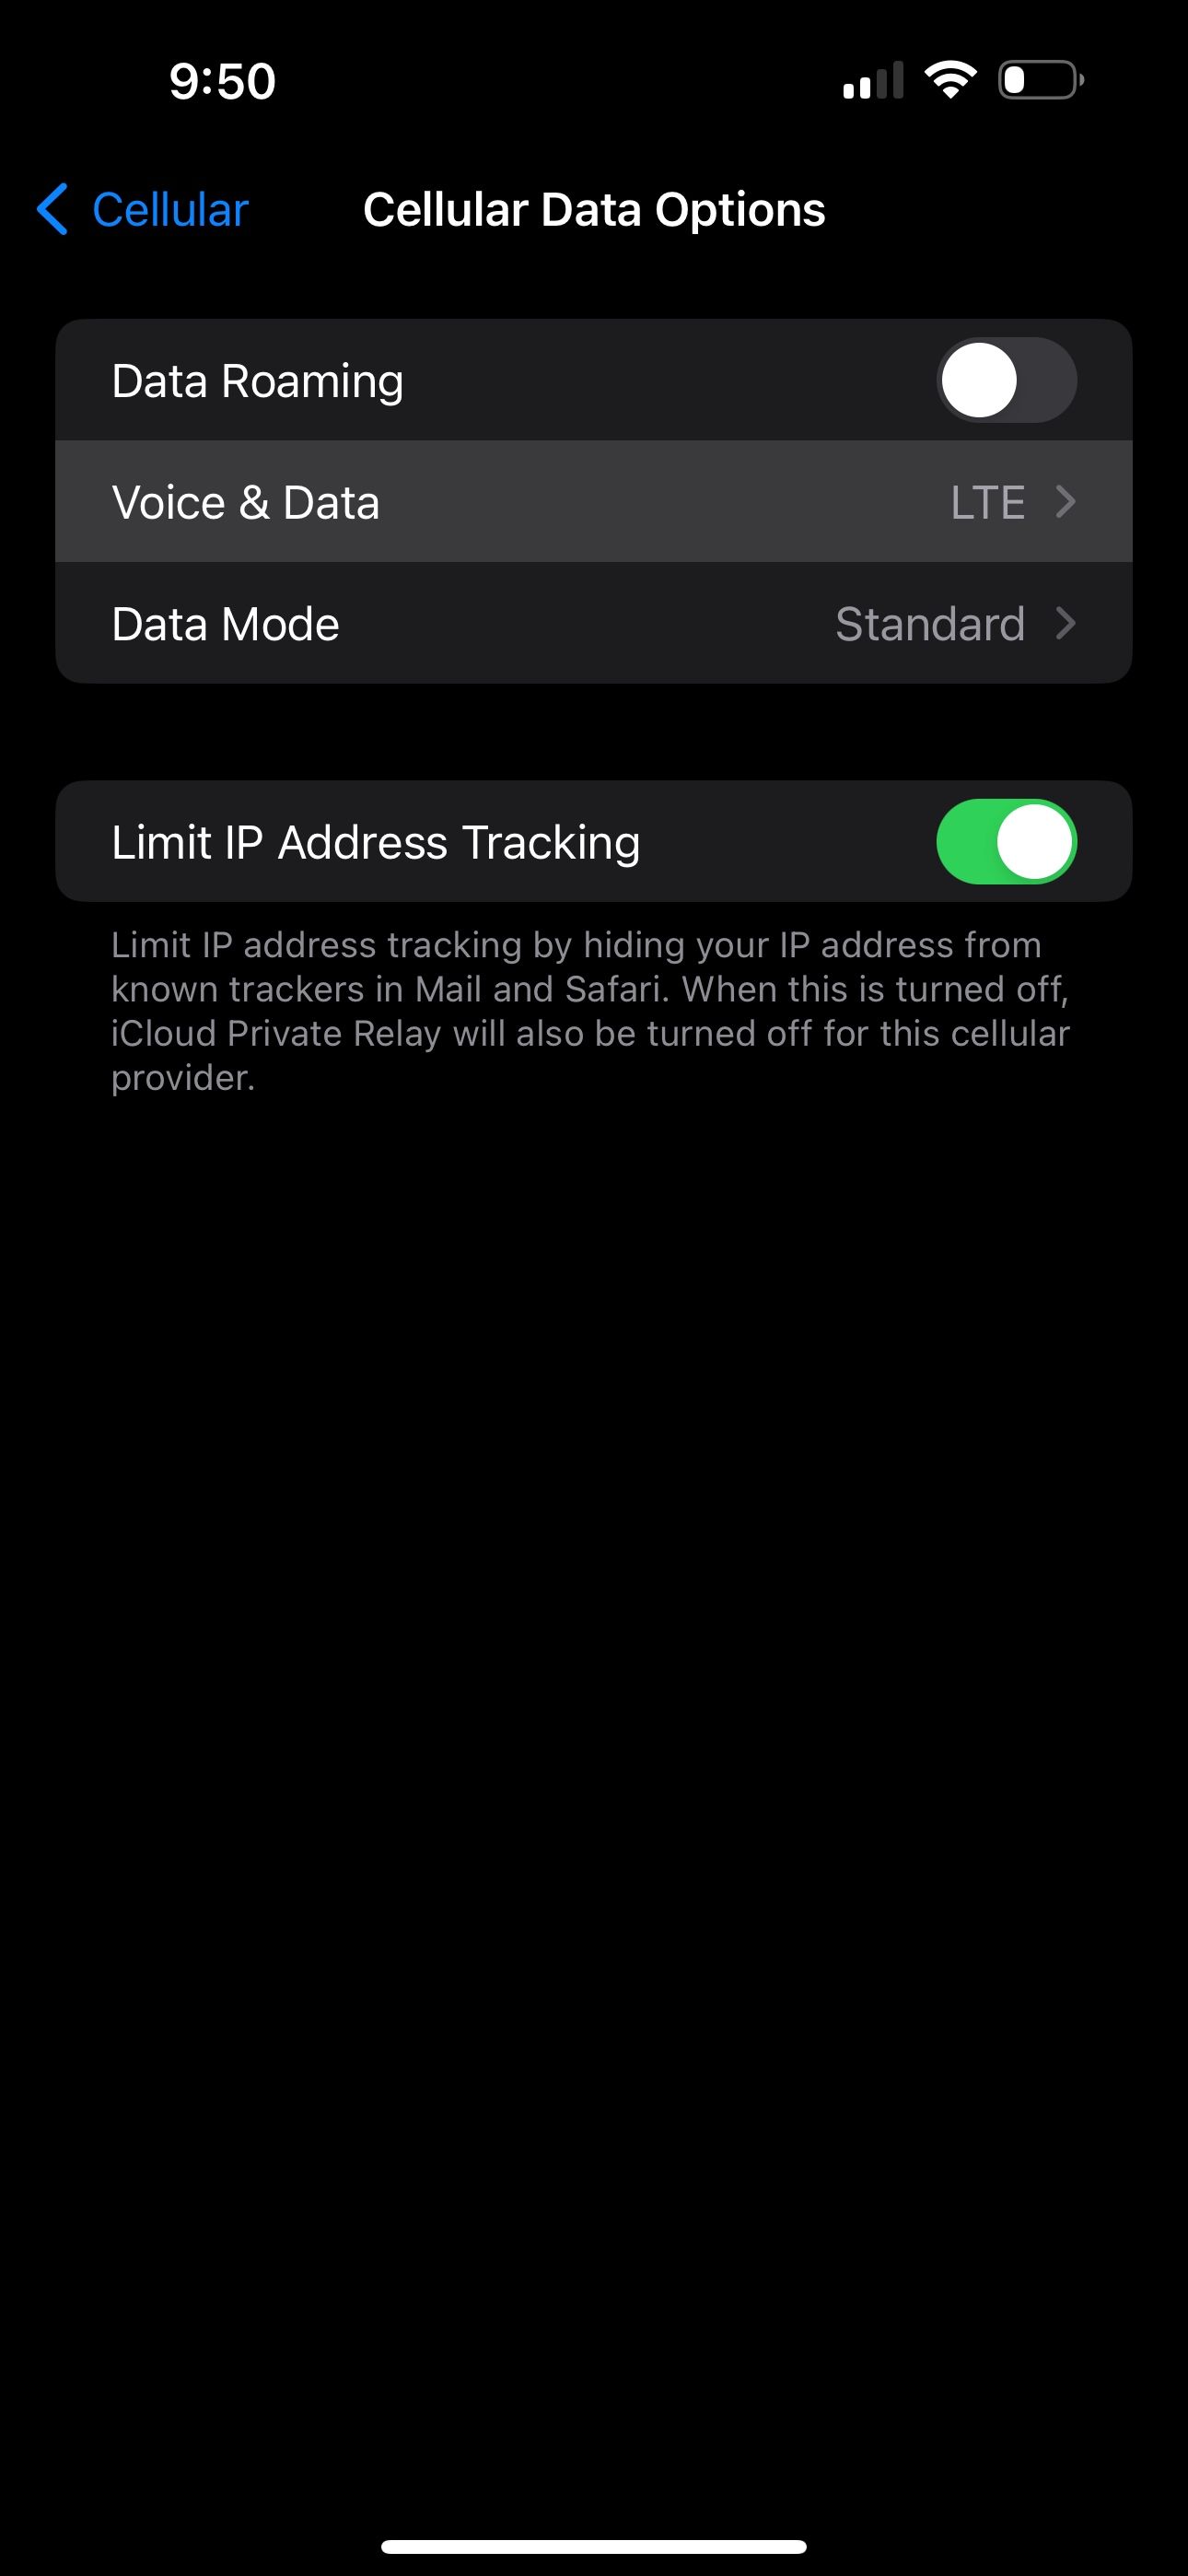
Go toSettings > Cellular > Cellular Data Options like before, but this time tapVoice & Data . If5G On or5G Auto is selected, chooseLTE and see if that gets rid of the SOS Only status.
4. Restart Your iPhone
Of course, we have to mention the good old reboot technique. If you haven’t yet tried turning your iPhone off and on again, let’s go ahead and test it out. You’d be surprised how many little annoyances a quick restart can resolve.
The steps to restart your iPhone are different depending on which model you have, but it’s pretty easy nonetheless.
5. Check for Carrier Settings Update
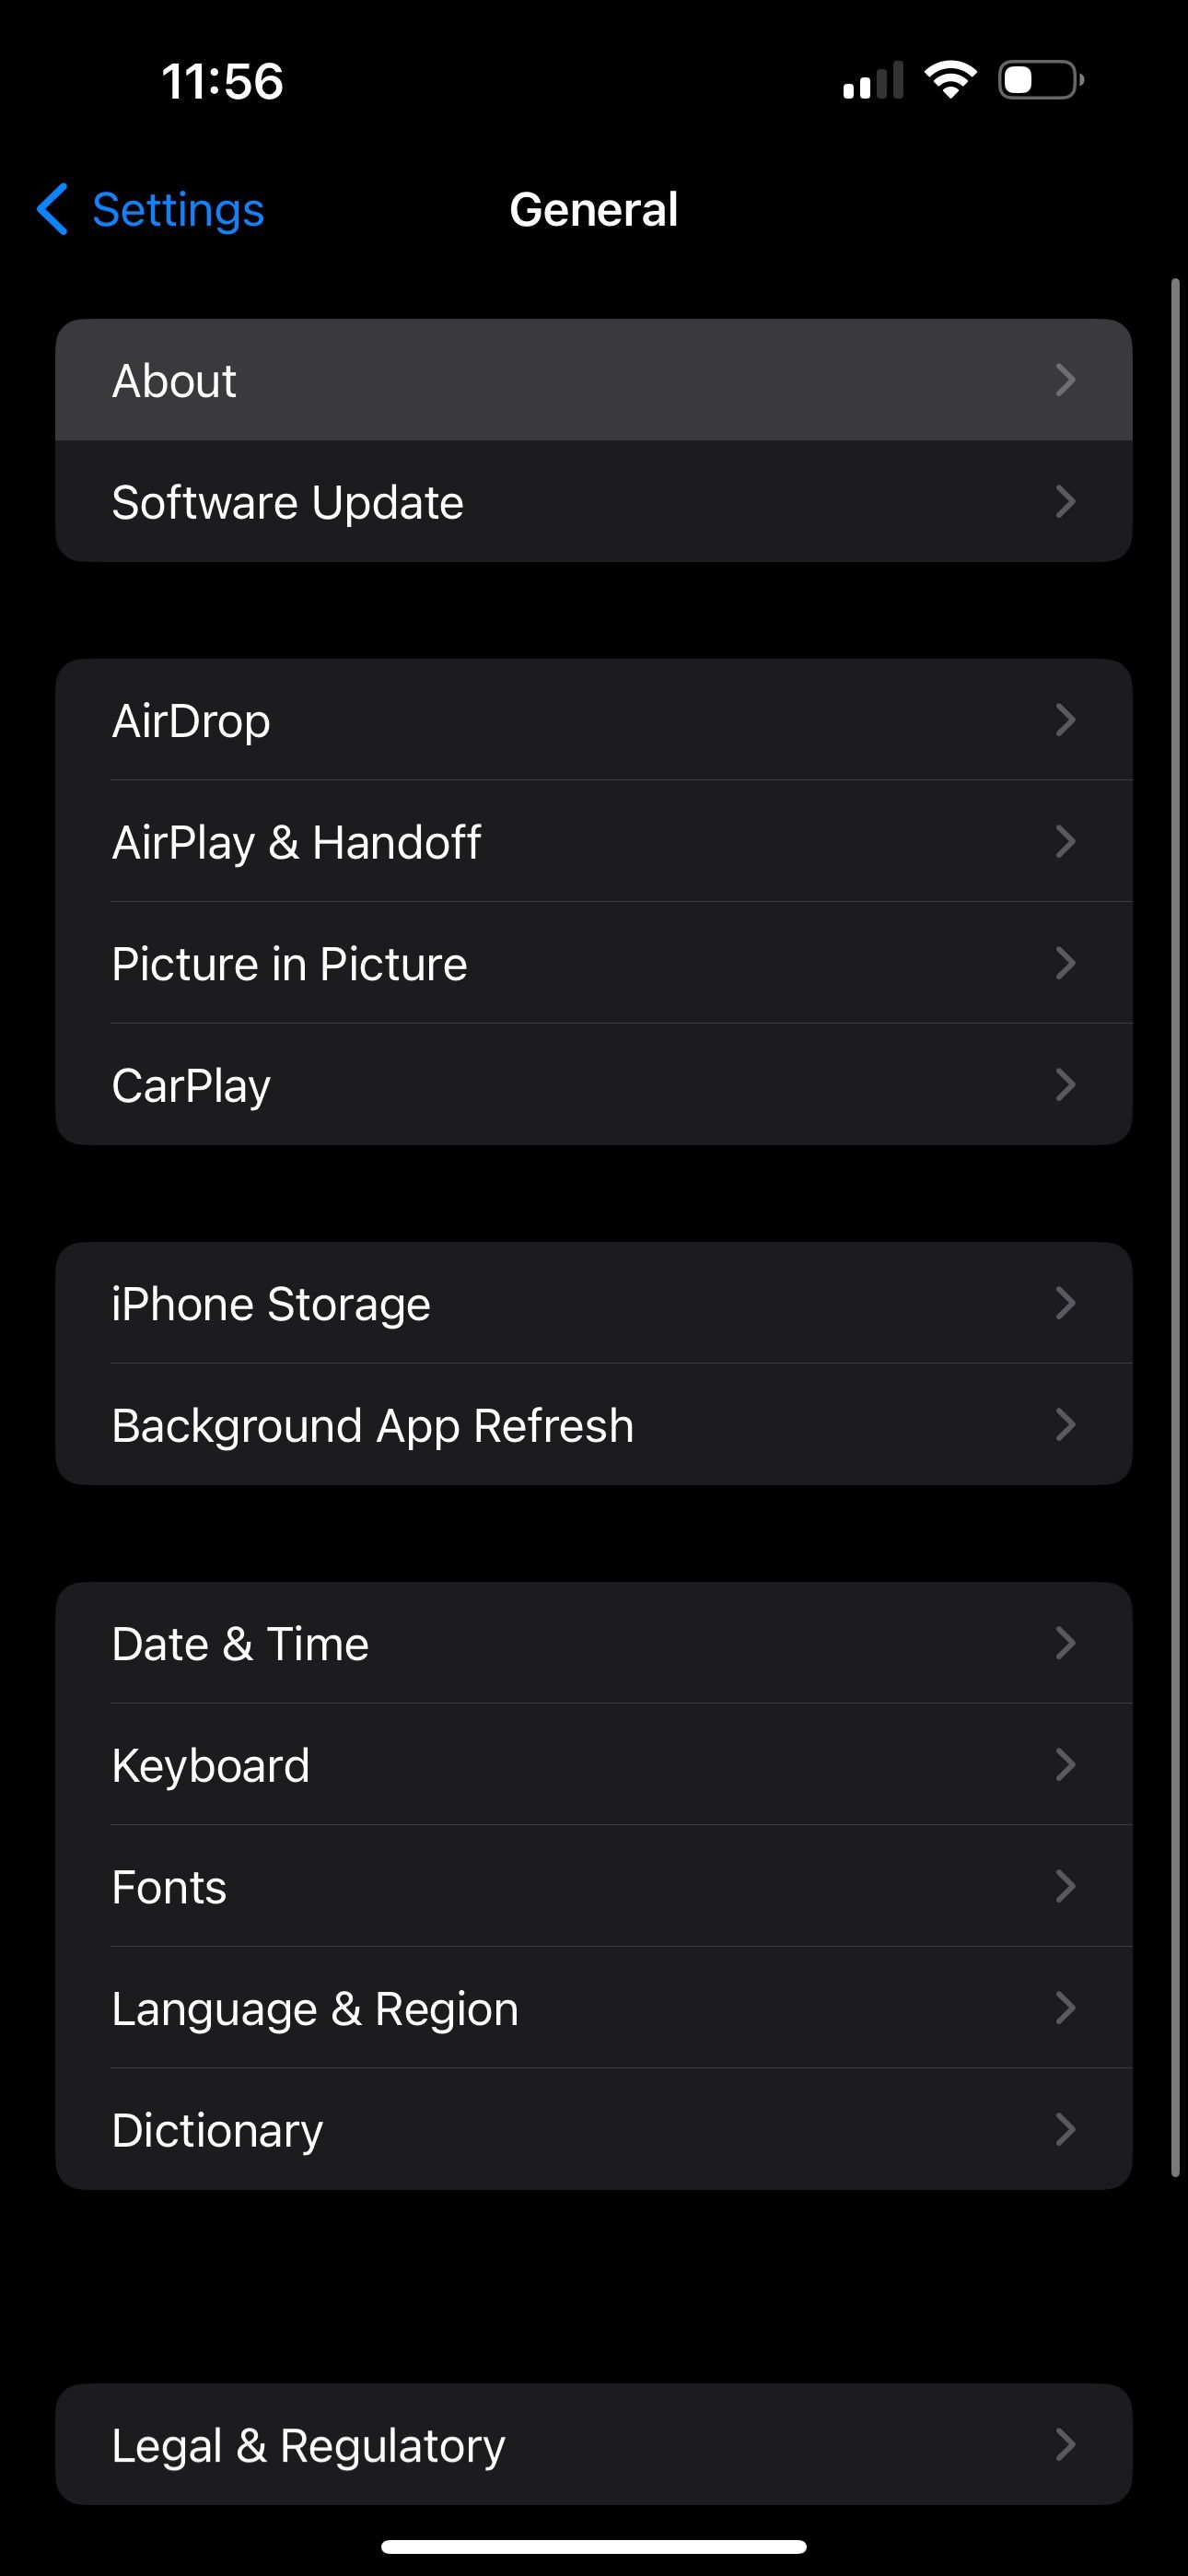
Sometimes, carriers roll out over-the-air updates that can solve problems with connectivity. To check if one is available for your iPhone, openSettings , then go toGeneral > About and wait for a few seconds.

Close
If your device needs a carrier settings update, you’ll get a pop-up on this screen. If you don’t see one, you’re up-to-date already.
6. Contact Your Carrier
When all else fails, you should contact your carrier to see what’s going on. Since having SOS Only status on your iPhone greatly limits the features you can use, you wouldn’t want to have it for long.
There may be an issue with your cell service that’s worth getting to the bottom of. So, visit your carrier’s website and search for a contact or support page to get a customer support phone number.
Getting to the Bottom of “SOS Only”
It’s frustrating when you don’t have cell service on your iPhone. So, we hope one of these solutions aids in getting your service up and running again.
If “SOS Only” is a frequently reoccurring issue, and you know lack of coverage isn’t the problem, you may want to contact your carrier anyway, even if you managed to fix the issue temporarily.
Also read:
- [New] In 2024, Unveiling the Powerhouse Q500 Typhoon
- [Updated] 2024 Approved Mastering Video Selection Adding to Your YouTube Playlists
- [Updated] Launchpad Equipment The Beginner's Checklist for 2024
- 4 Feasible Ways to Fake Location on Facebook For your Realme C67 5G | Dr.fone
- Baffled by Technology? Could This Be an Indicator That You've Been Blocked on iMessage?
- Comprehensive iOS Enhancement Rolled Out by MacXDVD for Latest iPhone 7 and iPhone 7 Plus Devices
- Encountered Facial Recognition Glitches? Try These 14 Fixes for a Smooth iPhone Face ID Experience
- Fine-Tuning for Triumph: FPS Game Settings
- Get Fallout 4 Running Smoothly Again on PC - Error-Free Gaming Tips
- Getting Acquainted with Zhuyin
- Immediate Remedies to Reactivate Auto-Predicting Emojis on iPhones & iPads
- In 2024, Comprehensive IPTV Platform Agnosticism
- In 2024, Tips and Tricks for Setting Up your Poco M6 Pro 5G Phone Pattern Lock
- IOS 16 Lock Screen Troubles: How to Activate and Enhance the Depth Effect Feature (7 Tips)
- IPhone Frozen? Try These 7 Tricks to Escape the Apple Emblem Loop!
- Missing iPhone Notifications? Try These 7 Fixes for a Quick Solution
- Muting an iPhone Without the Silent Button - Solutions for a Non-Responsive Switch
- Restoring Access to Your Disabled iPhone/iPad: Effective Solutions
- Step-by-Step Guide: Restoring Connectivity of Your iPhone Hotspot
- Title: Rectify Your iPhone's Constant 'SOS' Alert: Discover 6 Proven Methods
- Author: Edward
- Created at : 2024-10-26 19:21:20
- Updated at : 2024-10-30 18:06:52
- Link: https://fox-that.techidaily.com/rectify-your-iphones-constant-sos-alert-discover-6-proven-methods/
- License: This work is licensed under CC BY-NC-SA 4.0.