
Step-by-Step Guide: Performing a Complete iOS Device Restoration

Step-by-Step Guide: Performing a Complete iOS Device Restoration
Quick Links
- Preparing Your iPhone or iPad for a Factory Reset
- How to Reset Your iPhone or iPad to Factory Settings
- How to Reset Your iPhone or iPad Using a Computer
- After Resetting Your iPhone: Shut Down or Restore
Key Takeaways
- Back up your iPhone or iPad before resetting to avoid losing data and settings.
- Check your two-factor authentication settings to avoid locking yourself out of your account.
- Reset your device through the Settings menu or using a computer if needed. The prompts will guide you through the process.
Whether you need to erase your iPhone because you’re selling it or are trying a reset to fix a problem, it’s not difficult to do. Here’s a complete guide on how to factory reset your iPhone or iPad.
Preparing Your iPhone or iPad for a Factory Reset
Modern versions of iOS and iPadOS simplify the factory reset process because they handle several important steps at once, rather than requiring you to do them beforehand. Still, there are a few important points to be aware of before you jump into the reset.
Make sure you know your device’s passcode and your Apple ID login before continuing. You can reset your Apple ID password if needed.
Back Up Your iPhone or iPad
The most important preliminary step before a reset is backing up your iPhone or iPad. A backup allows you to restore almost everything on your phone to the way it was, so you don’t have to start from nothing. This is vital whether you’re upgrading to a new phone or resetting yours as a troubleshooting step.
See our guide to backing up your iPhone for complete instructions on backing up to iCloud or your computer.
Check Two-Factor Authentication Settings
Another important consideration is making sure you don’t lock yourself out of your account.Apple’s two-factor authentication (2FA) requires a code sent to your trusted Apple devices or phone numbers when you log into your Apple ID. This can pose a problem if the device you’re resetting is your only 2FA option.
If you have another Apple device where you’re already signed into your account with 2FA, you can use that to get a code after resetting your iPhone/iPad. Otherwise, make sure you have a secondary trusted phone number or security key registered to your account.
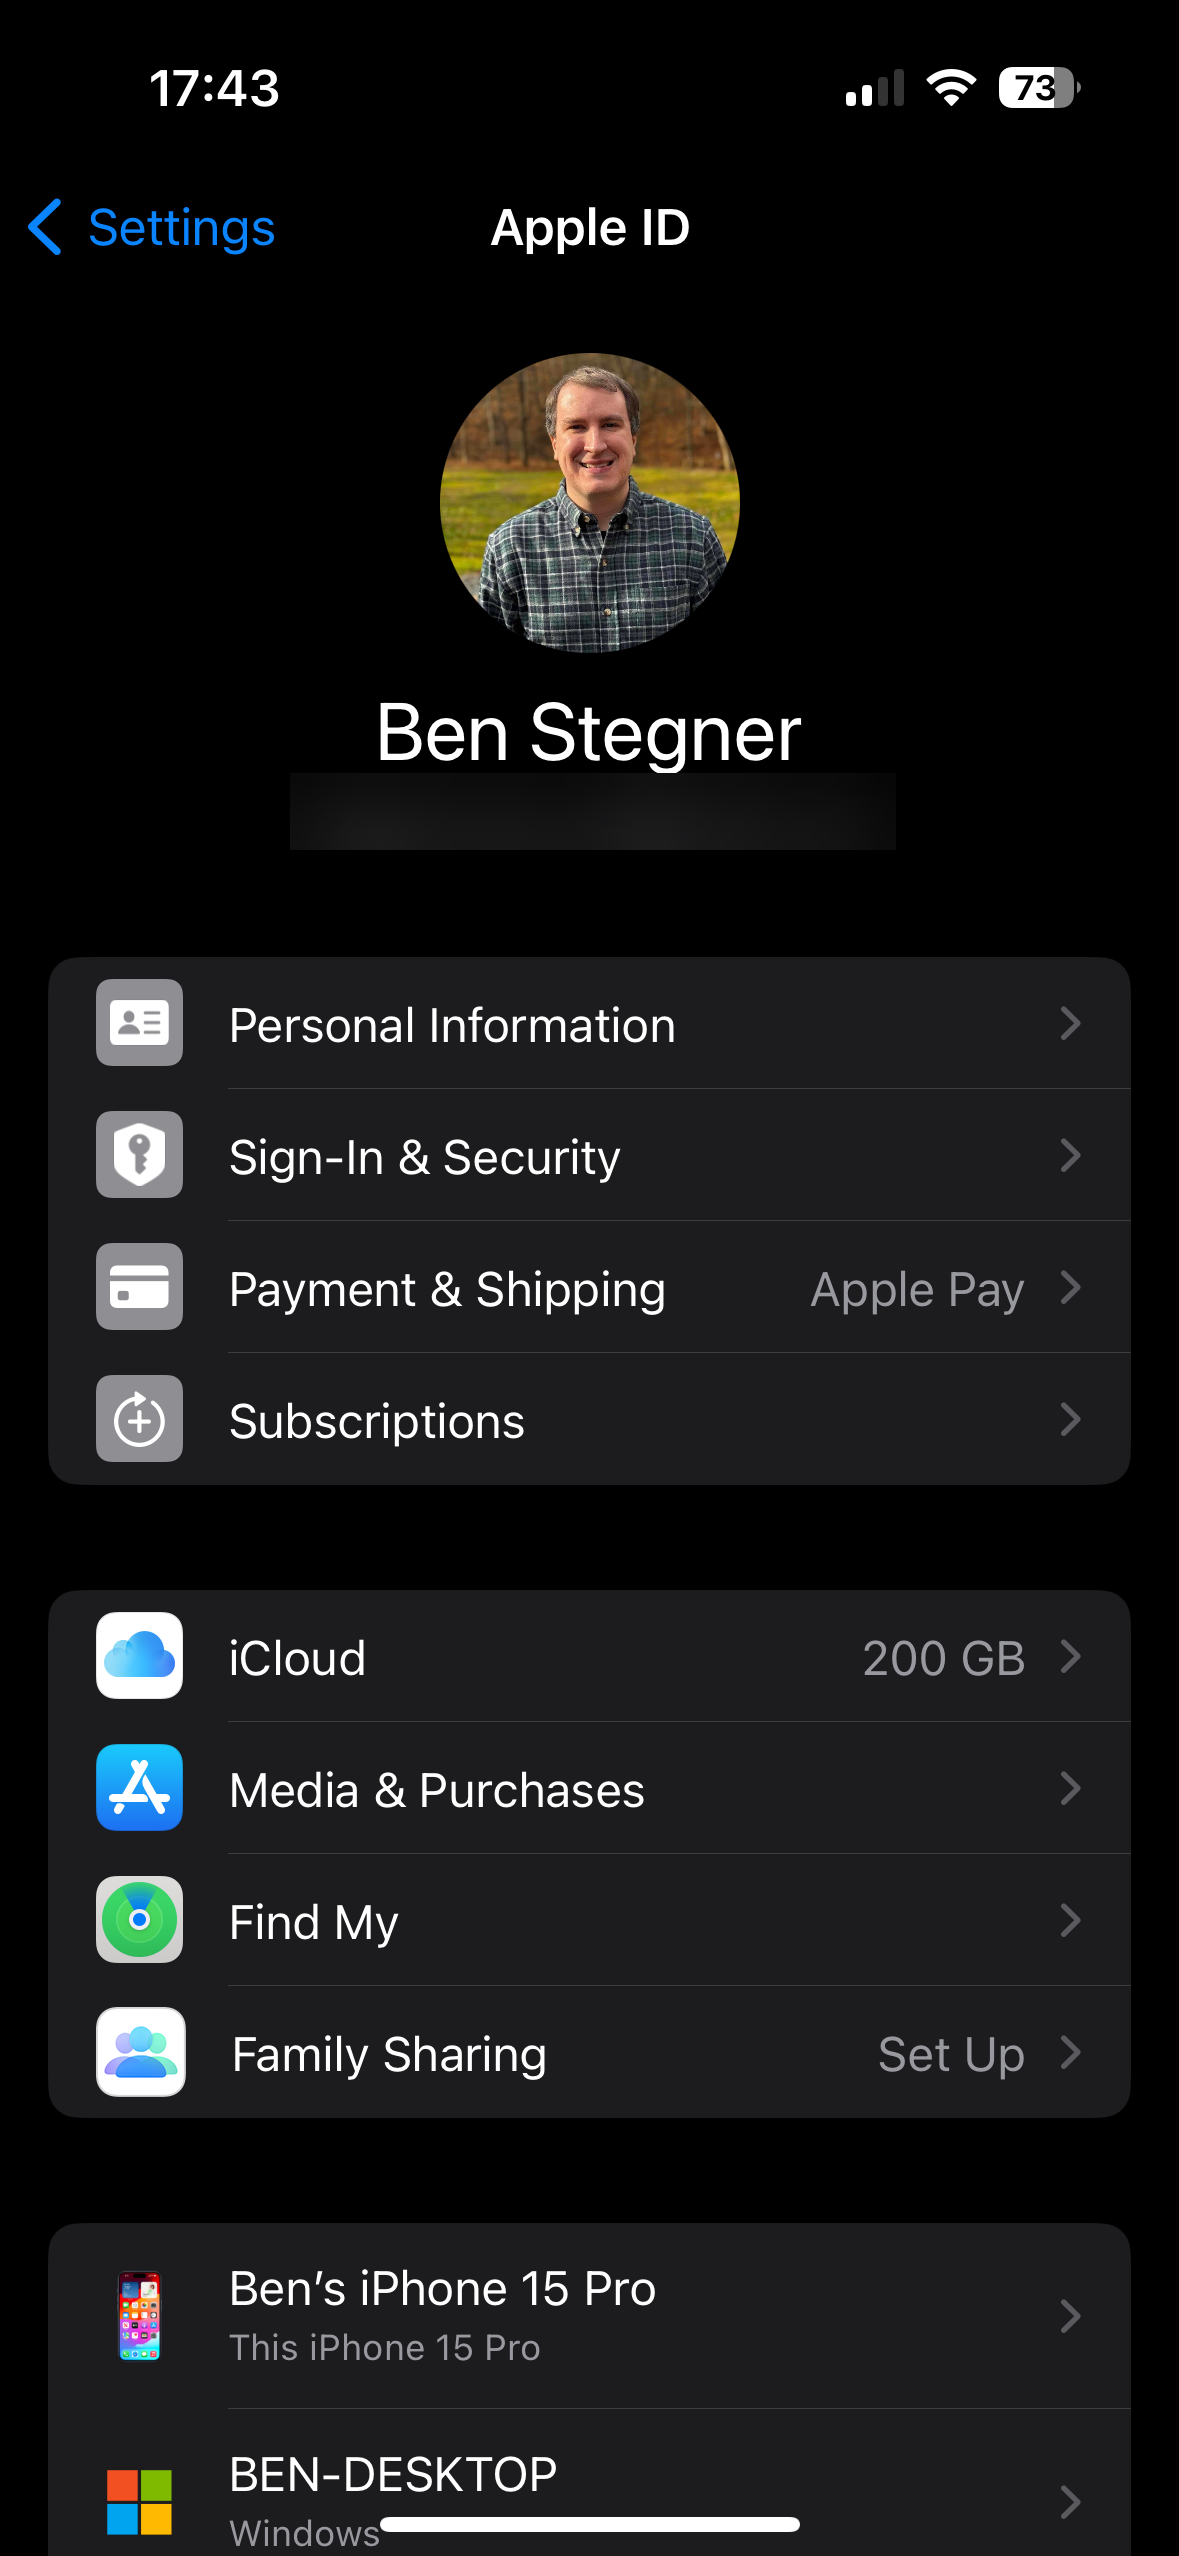
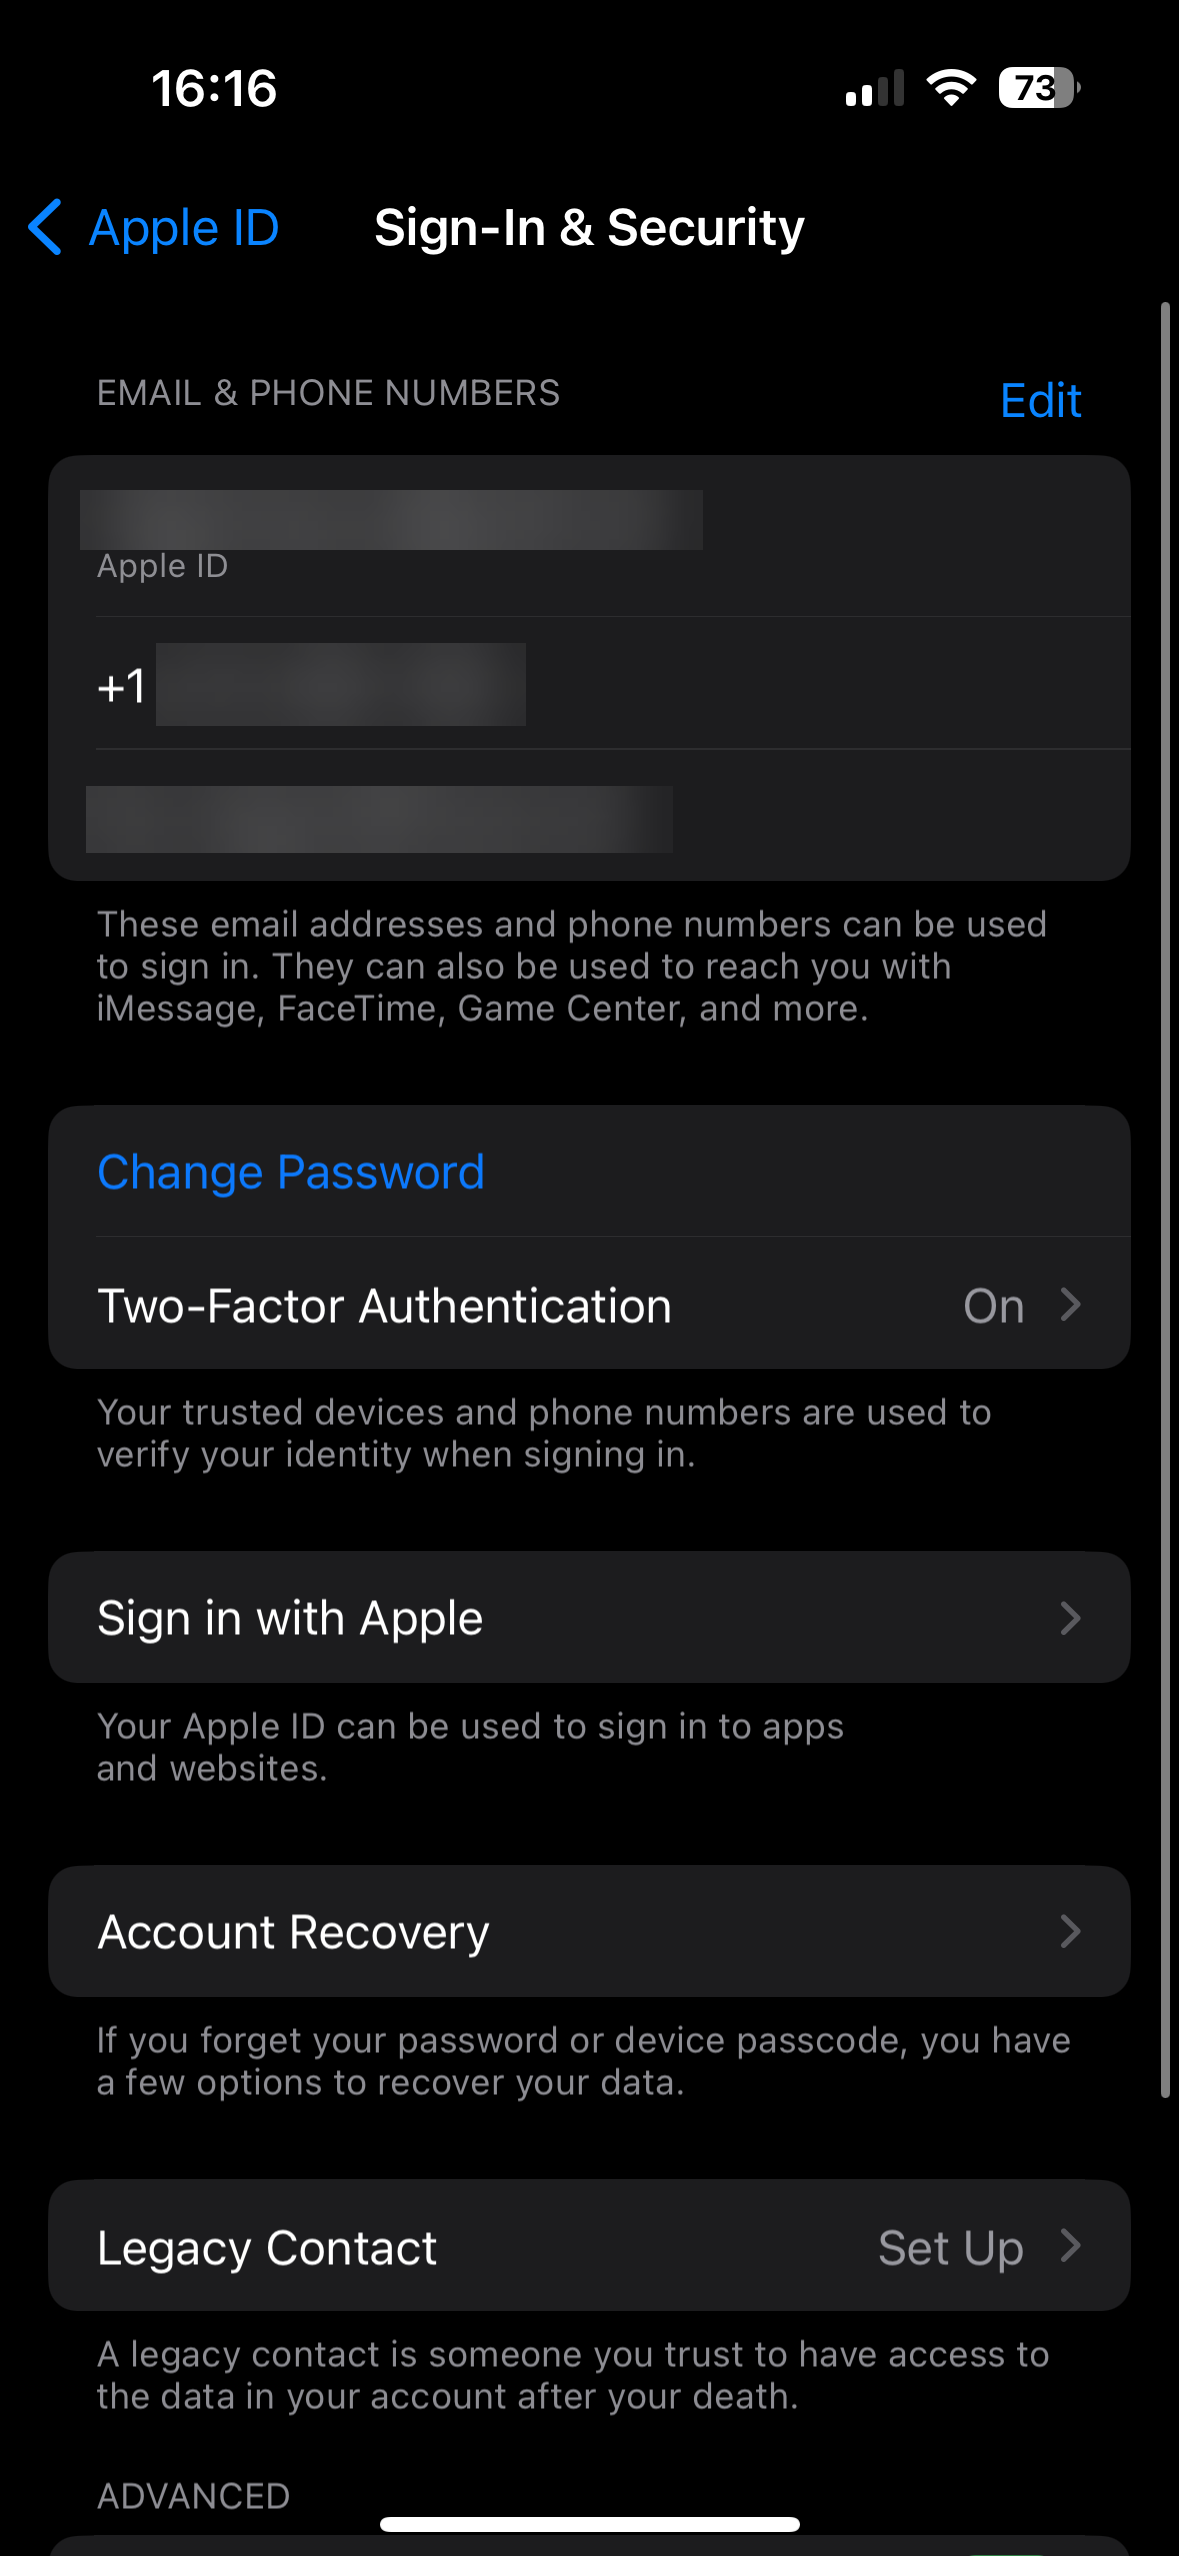
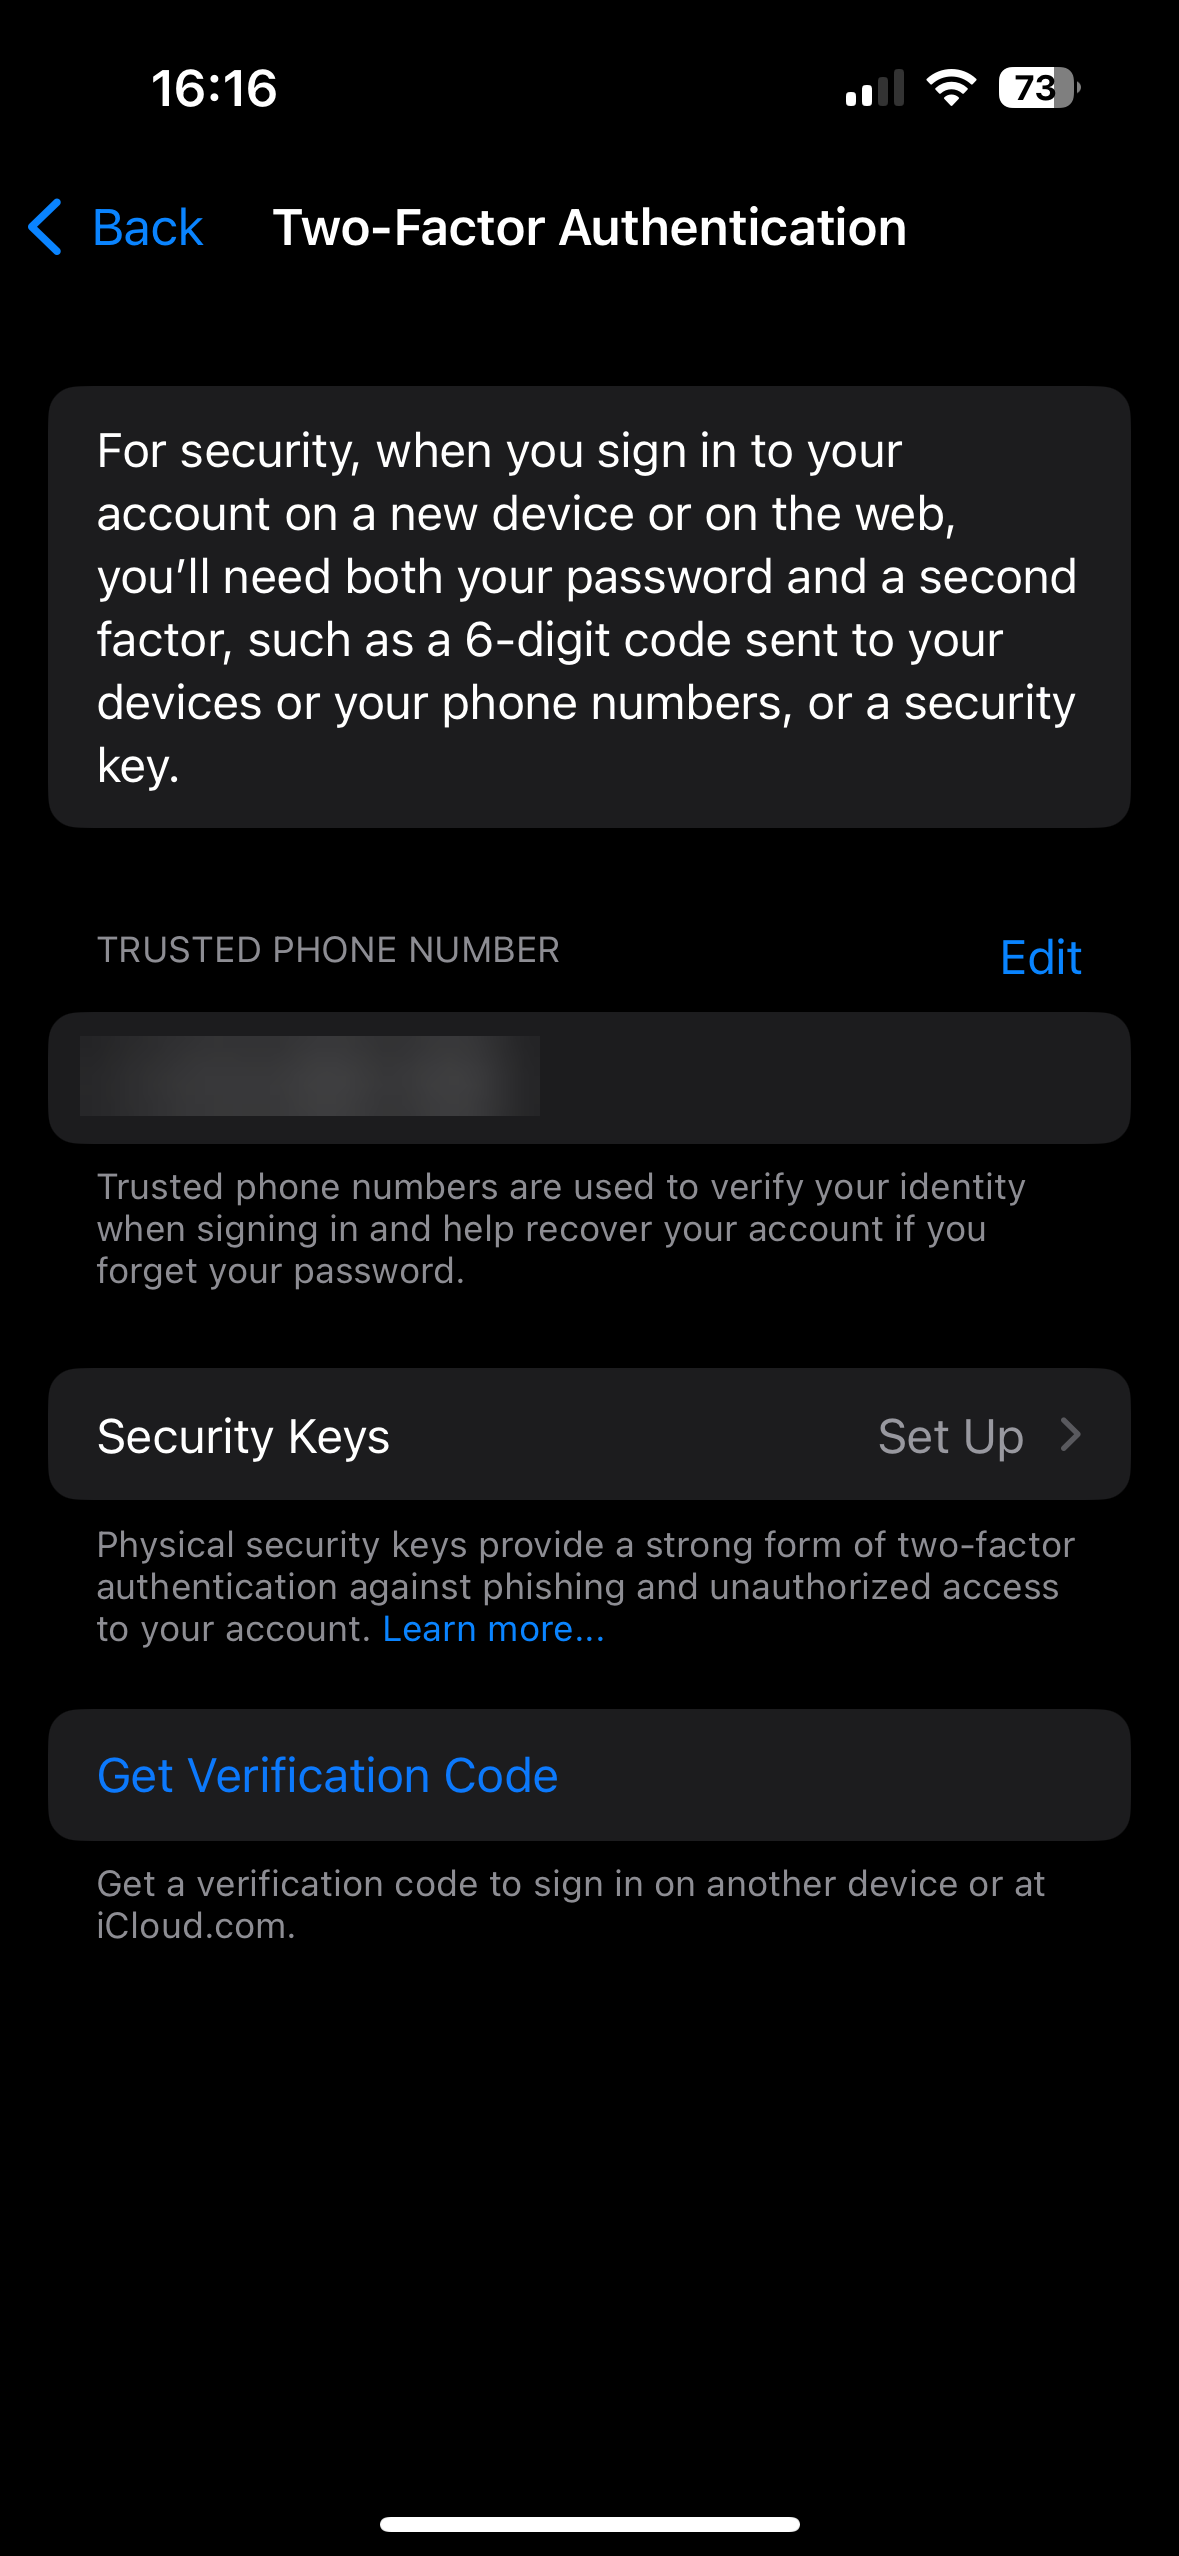
To check this, head toSettings on your iPhone/iPad and tap your name at the top of the list to open your Apple ID settings. ChooseSign-In & Security > Two-Factor Authentication to check yourTrusted Phone Number(s) andSecurity Keys . If you need to add one, do so here.
Close
If You’re Not Keeping Your Device
In case you’re factory resetting your iPhone or iPad to sell it, give it away, or trade it in, you should take some extra steps to ensure a smooth transfer to your next device and avoid problems for the new owner of your old one. This includes potential extra steps like unpairing your Apple Watch or AirPods, signing out of iMessage, and removing your SIM card. We’ve explained what to do before selling your iPhone if this applies to you.
When you’re performing a factory reset to troubleshoot issues, you don’t need to worry about these steps since you’re keeping the device.
How to Reset Your iPhone or iPad to Factory Settings
Just like backing up your device, there are two ways you can erase your iPhone or iPad: on the device itself or using a computer. We recommend resetting using Settings on your device unless you need to use the computer method for some reason.
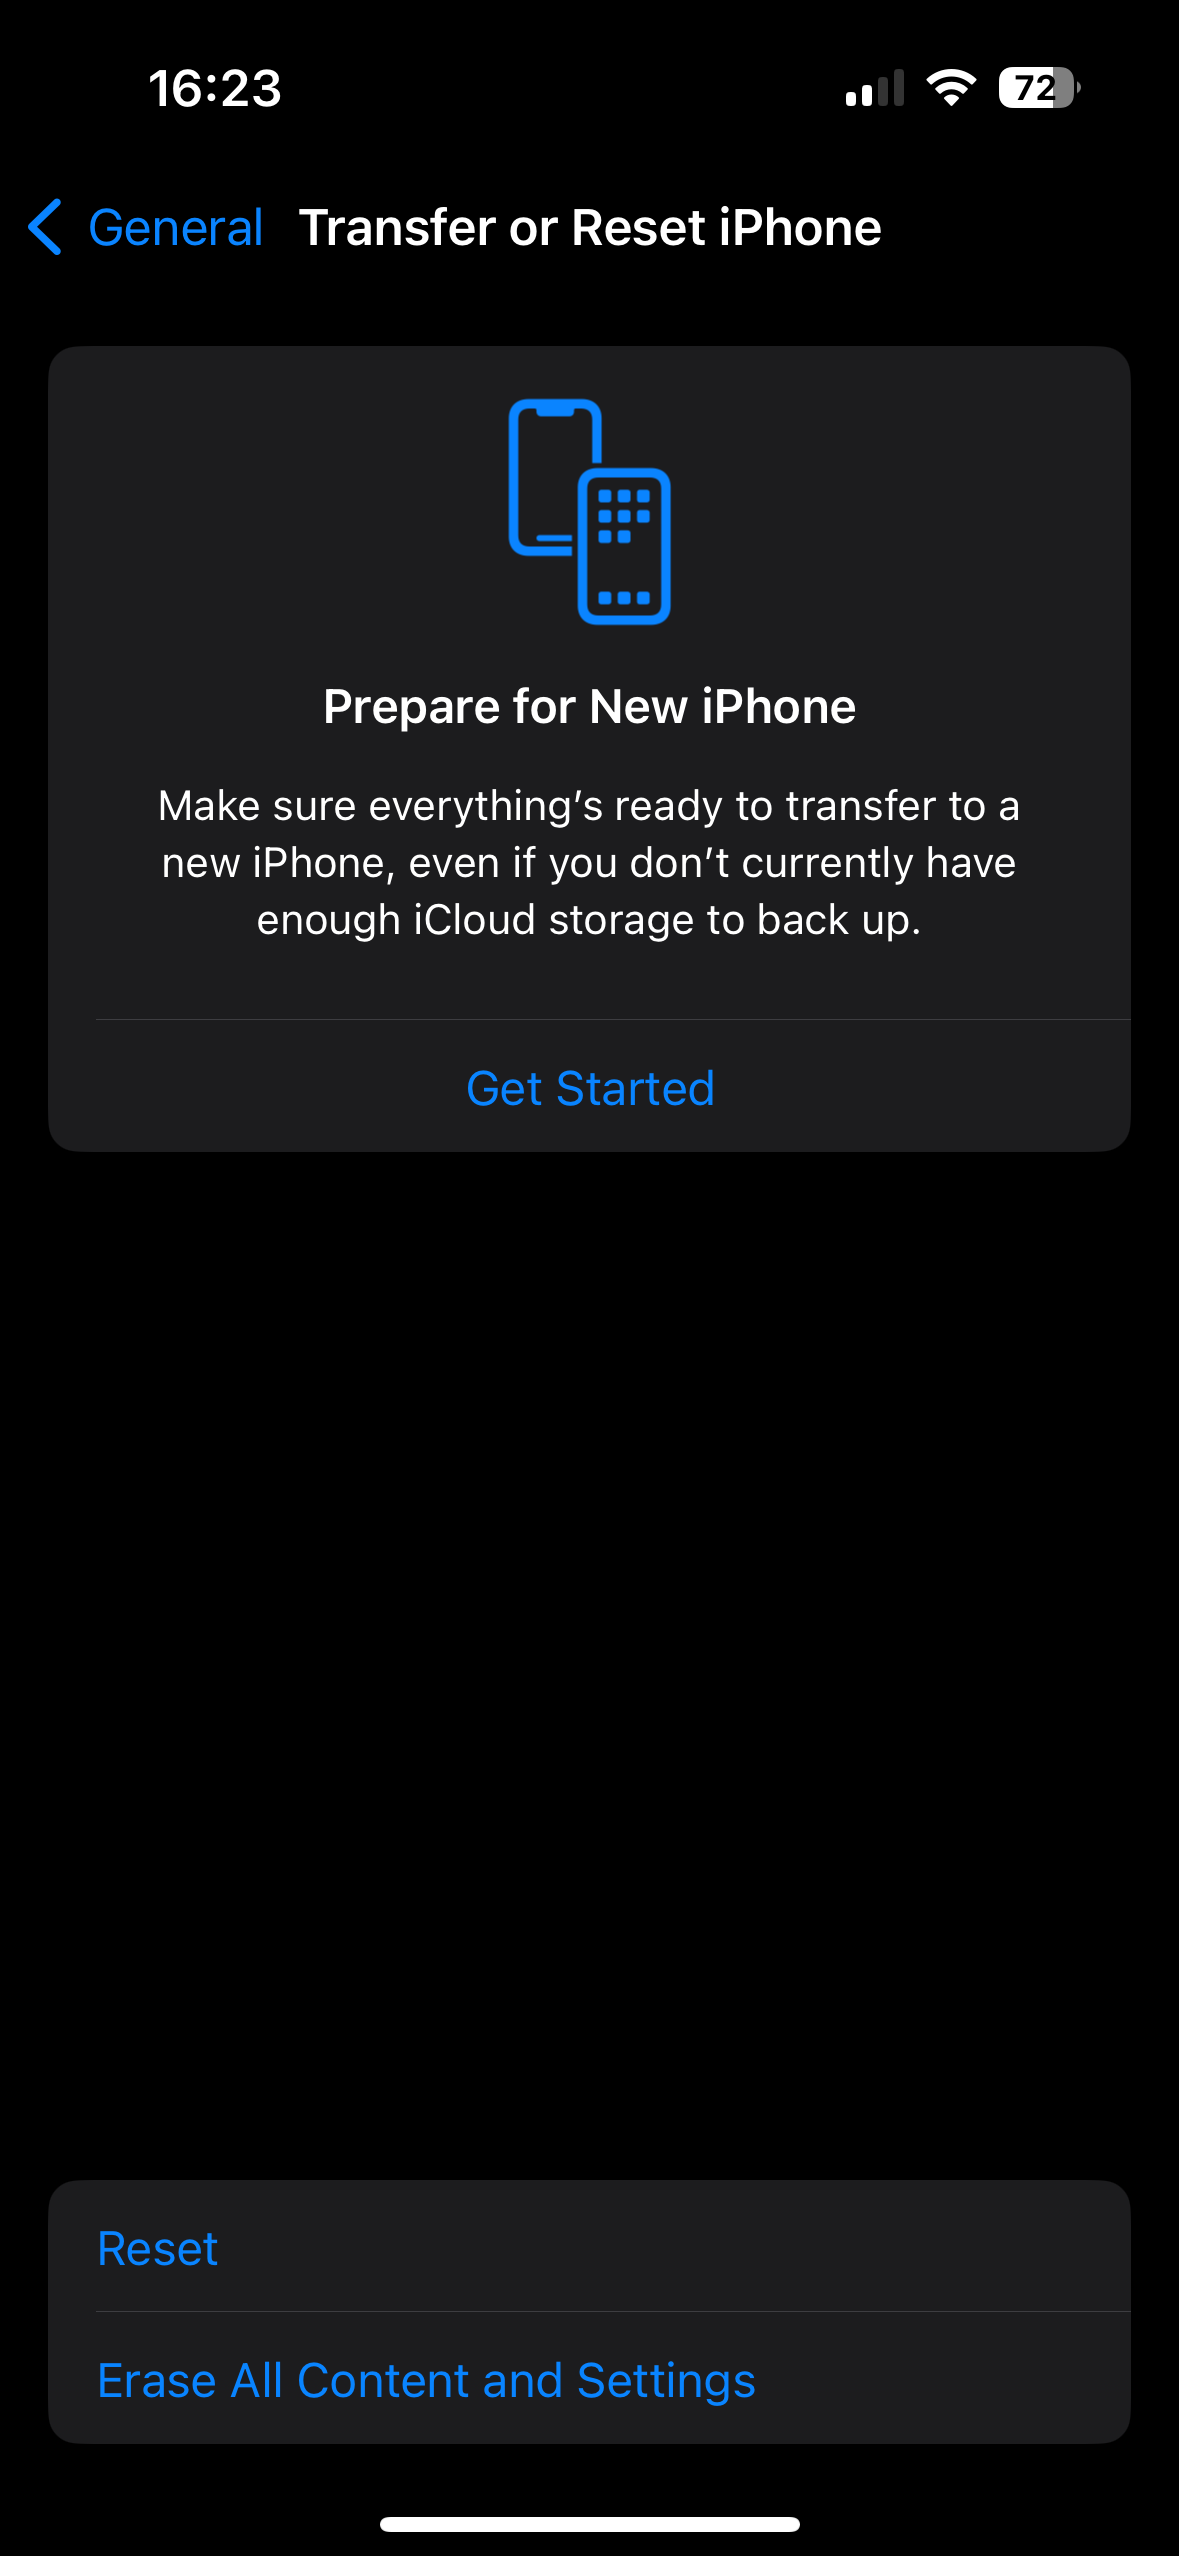
On your iPhone or iPad, go toSettings >General >Transfer or Reset iPhone/iPad . If you’re resetting this device because you’re moving to a new iPhone, tabGet Started underPrepare for New iPhone/iPad here and follow the instructions. Otherwise, tapErase All Content and Settings .
TheReset menu allows you to set various other options to their defaults without fully erasing your iPhone.
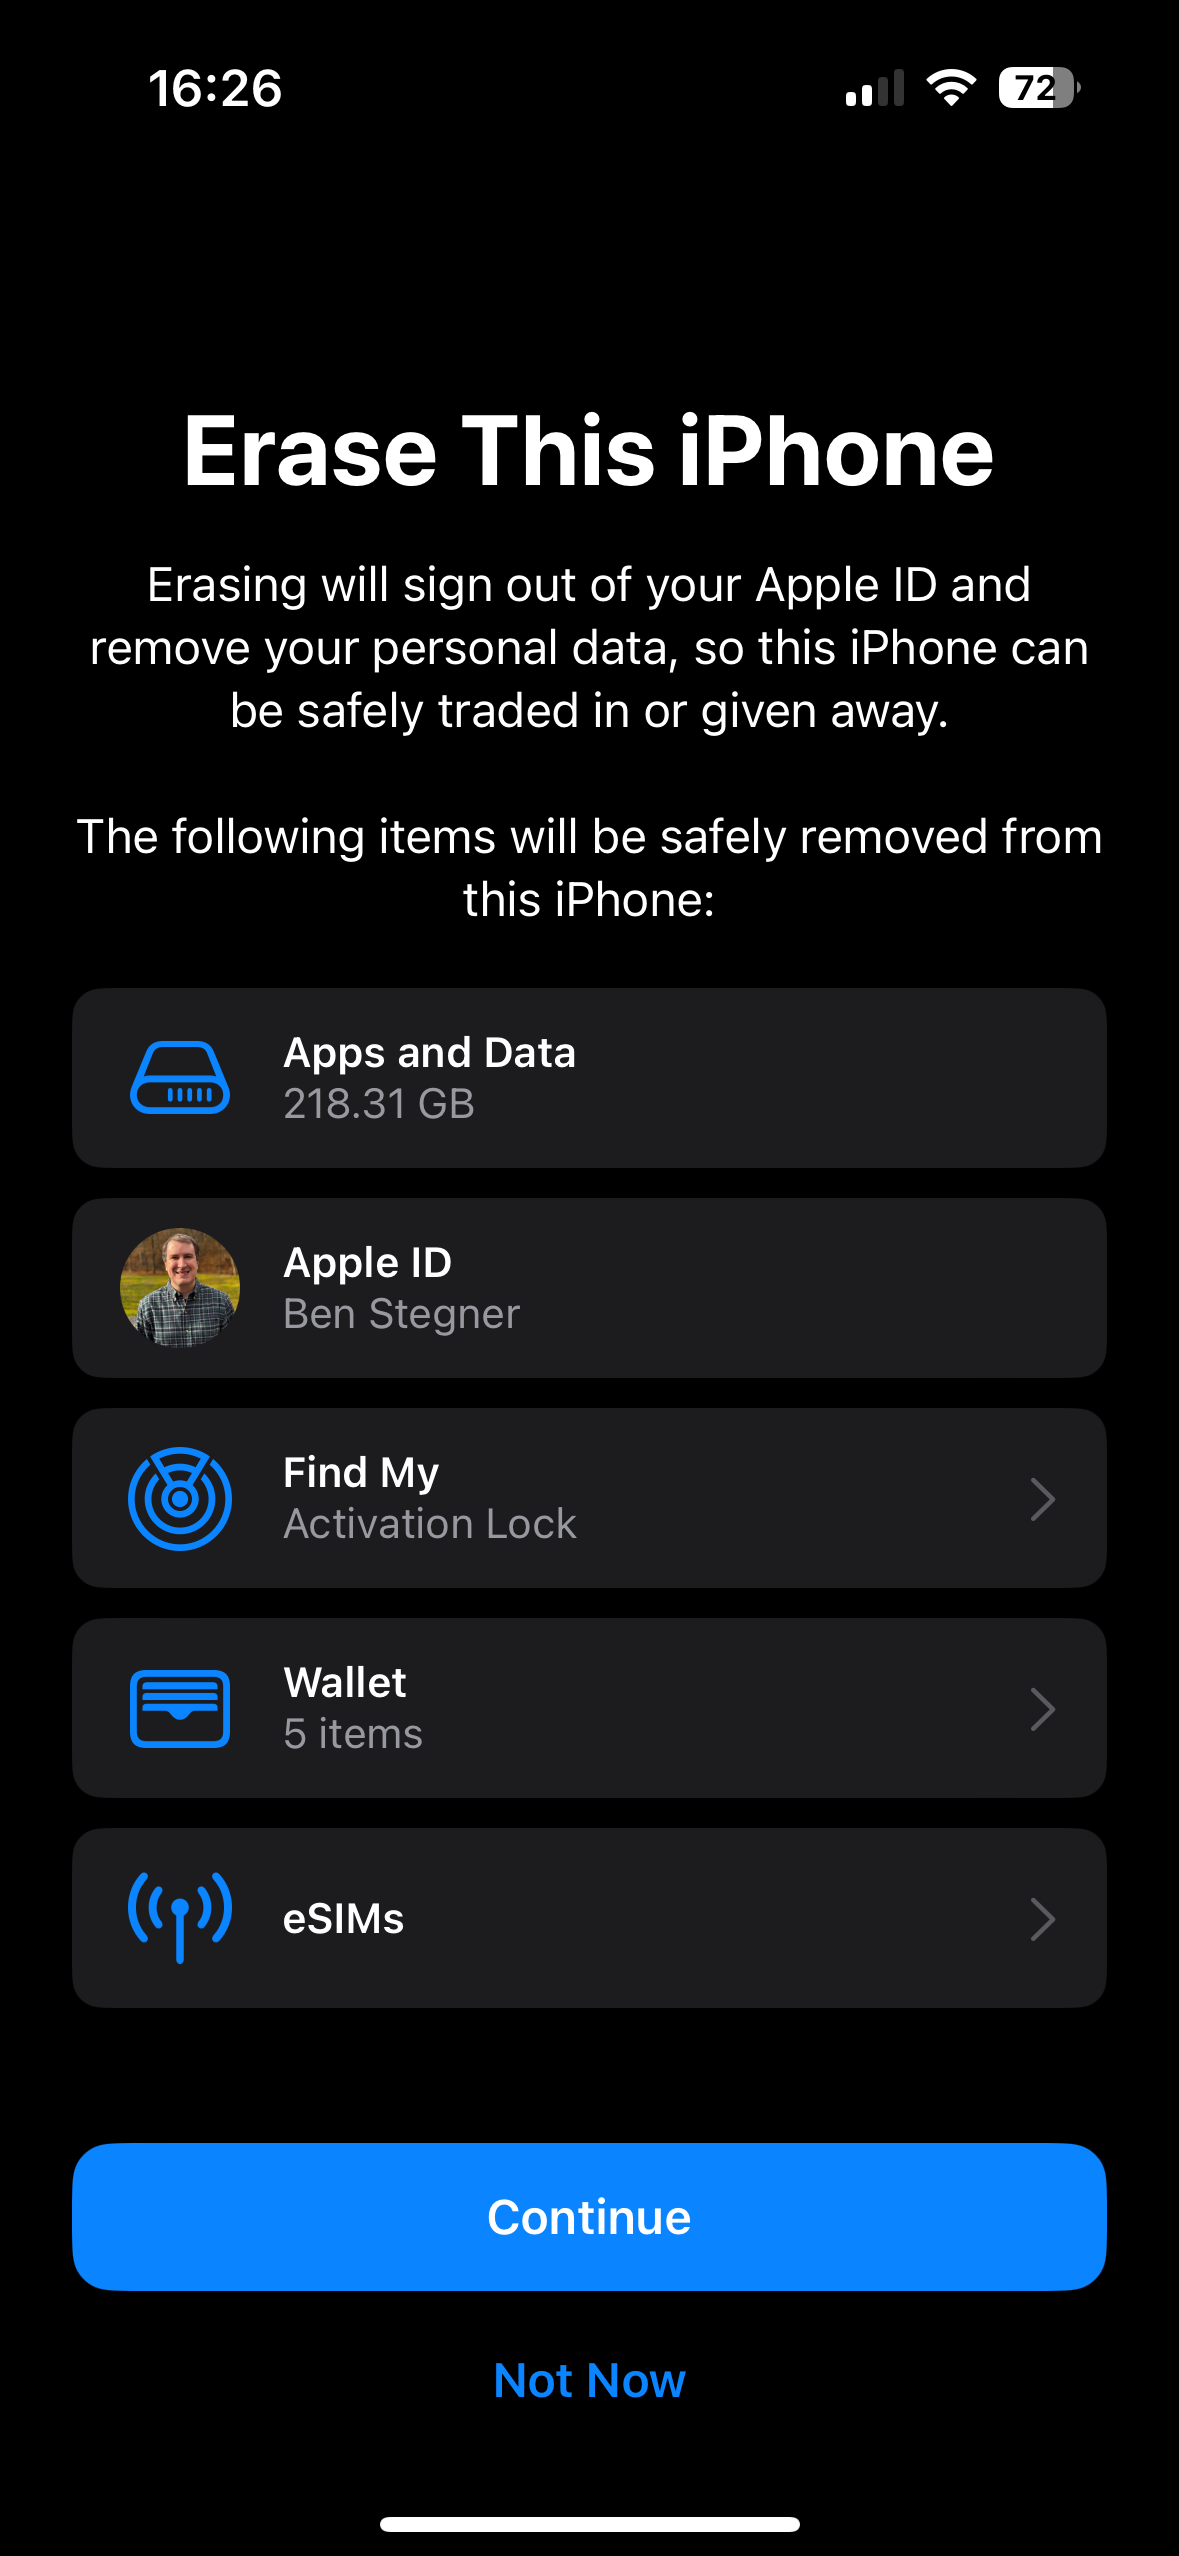
Once you tap this, you’ll see anErase This iPhone page with a summary of what will happen when you continue. Importantly, erasing your iPhone turns off Find My and Activation Lock as part of the process. Unlike older versions of iOS, you don’t need to sign out of your Apple ID separately to avoid Activation Lock preventing the new owner from using the phone.

Close
When you tapContinue , you’ll see an option toKeep orDelete any eSIMs on your phone. If you’re keeping this phone, keep them; if you’re selling it or trading it in, erase them. Consult your carrier for guidance on how to move your eSIM to your new phone.
The next steps will prompt you to create a backup, which you can skip if you’ve already done so.
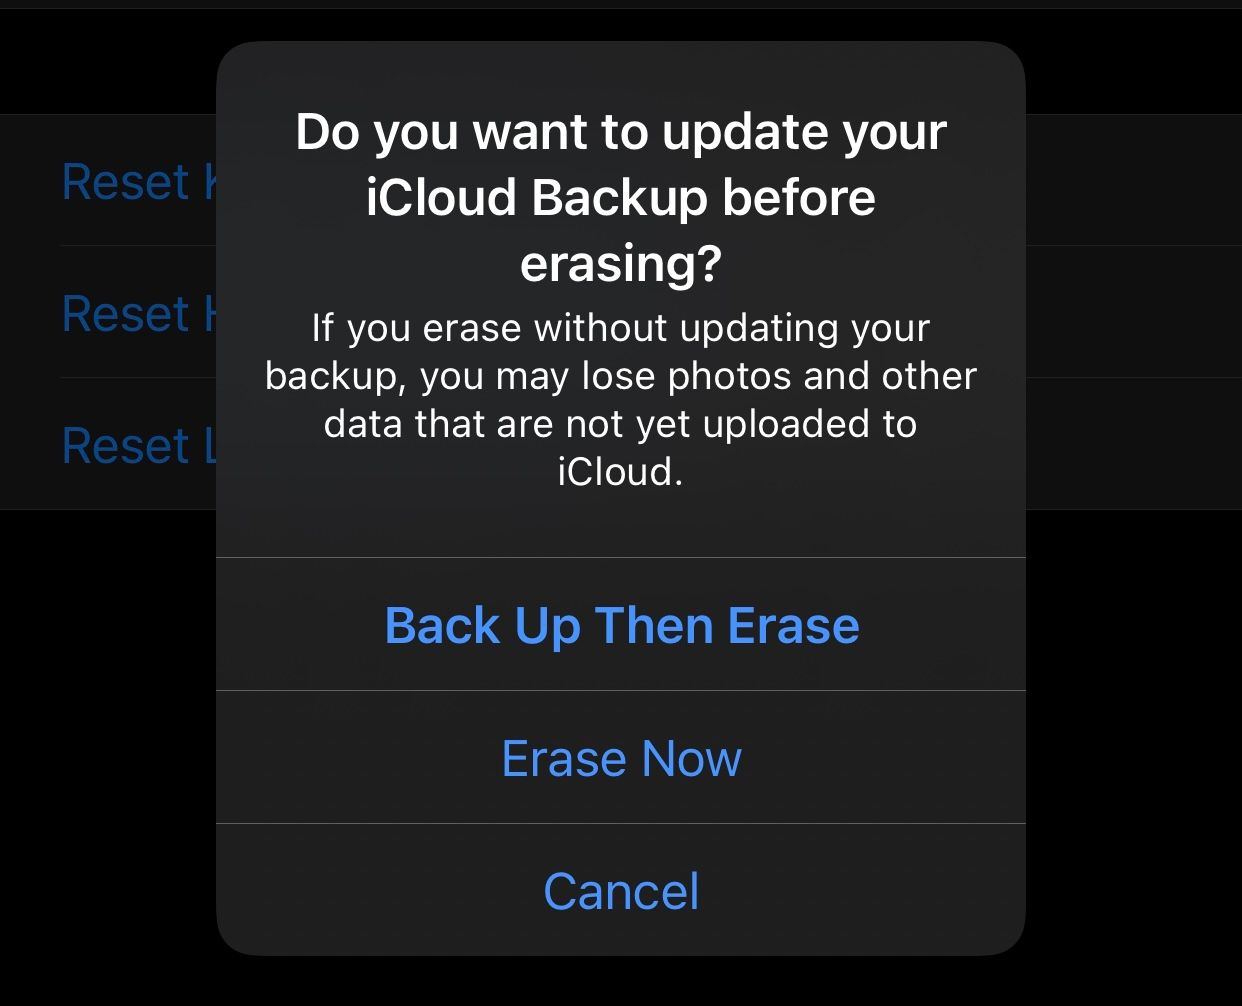
Finally, you’ll need to enter your iPhone’s passcode (and Screen Time passcode if applicable), then enter your Apple ID password to sign out of your account. Provide final confirmation with the lastErase iPhone/iPad prompt, and your device will start the factory reset process. There’s no going back once you’ve tapped this.
As your phone resets, you’ll see an Apple logo with a progress bar. Once your data has been wiped, your iPhone or iPad will restart.
How to Reset Your iPhone or iPad Using a Computer
In case you need to factory reset your iPhone and the convenient on-device method doesn’t work, you can use Finder (on a Mac) or the Apple Devices app (on Windows) to reset.
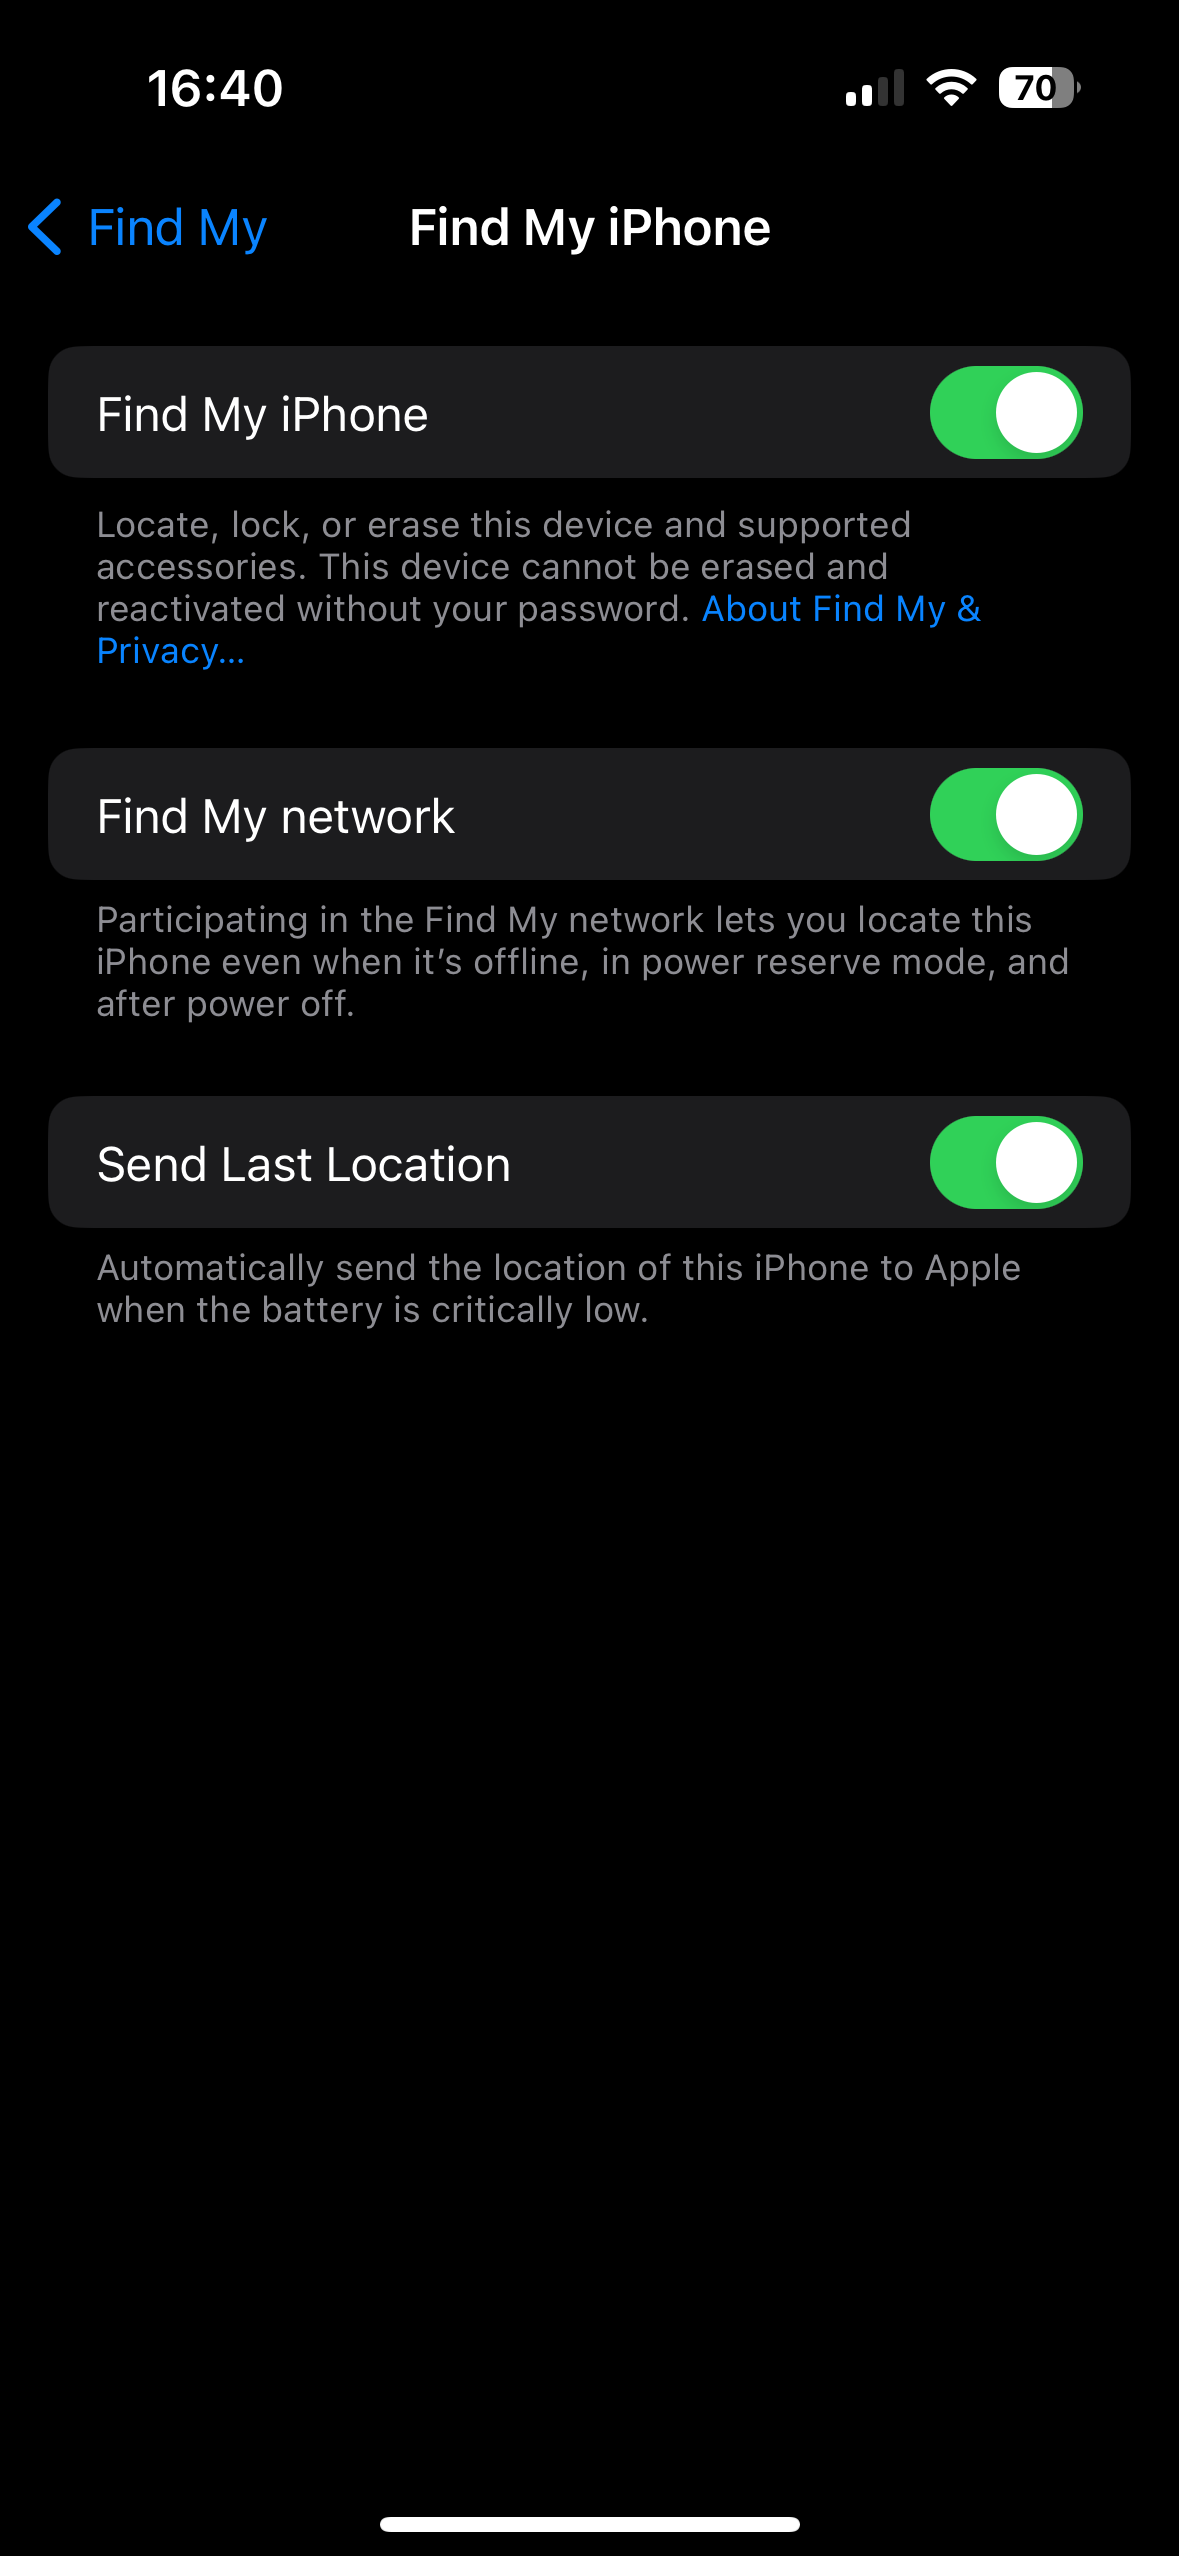
When using this method, you’ll first need to sign out of Find My on your device to disable Activation Lock. To do this, go toSettings , tap your name at the top, then chooseFind My . SelectFind My iPhone/iPad , then turn off the slider on the following page. Confirm your Apple ID password, then you’re ready to reset using a Windows PC or Mac.

Close
Connect your iPhone to your computer using a USB cable. You may need to approve the connection on your iPhone/iPad if you’ve never used it with this computer before.
On a Mac, openFinder and select your device fromLocations in the sidebar. Make sure you’re on theGeneral tab and hit theRestore iPhone/iPad button under theSoftware section.
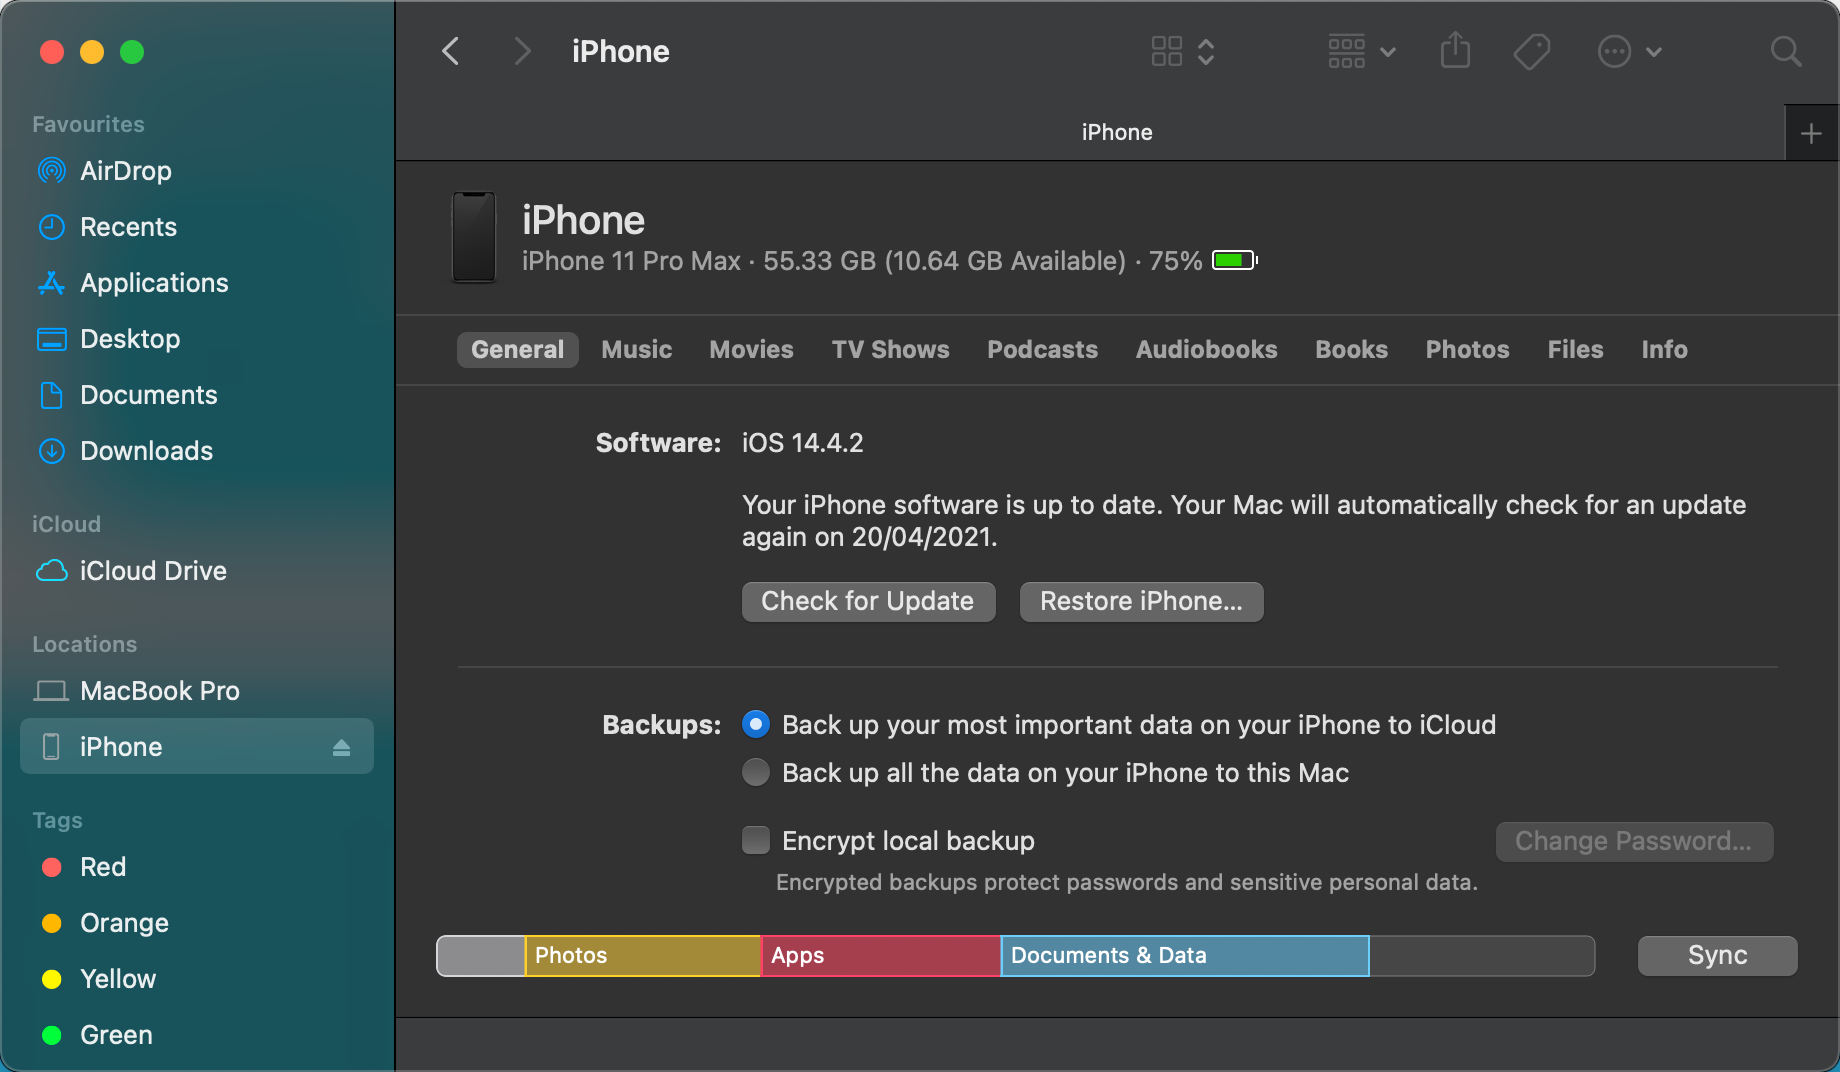
On Windows, open the Apple Devices app, expand the panel with your device’s name on the left side, and make sure you’re on theGeneral tab. In the top box underSoftware , clickRestore iPhone/iPad .
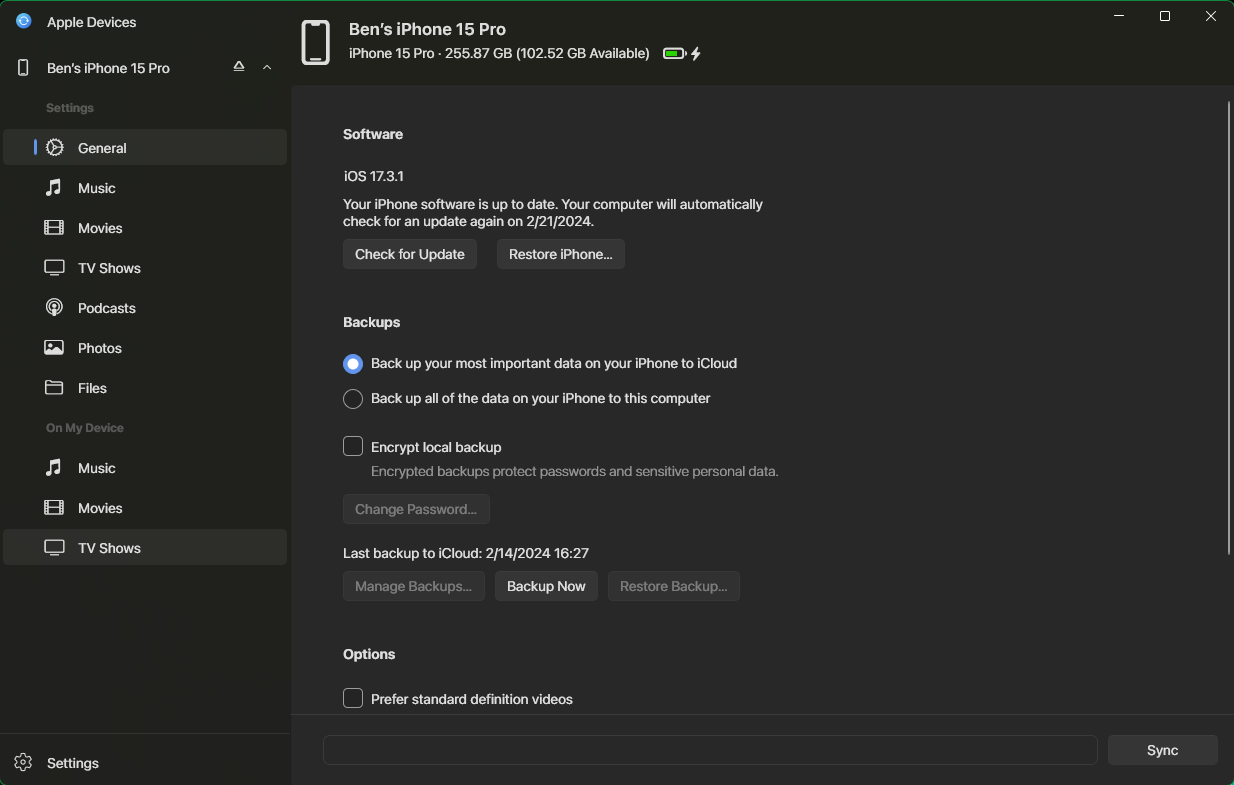
If you didn’t turn Find My off, you’ll see a warning that you must do this before proceeding. Assuming that’s done, clickRestore (orRestore and Update if there’s a new OS update available) to confirm. This will start the reset process on your device.
After Resetting Your iPhone: Shut Down or Restore
Once the reset finishes, when you see theHello screen, you’re clear to turn off the device if you’re not keeping it. It’s ready for the next owner to set up.
If you’re keeping your phone or tablet, go through the steps of setting up the device again. During this process,restore your iPhone backup to pick up where you left off.
That’s all it takes to factory reset your iPhone or iPad. With a backup, you don’t have to worry about moving to a new phone or resetting yours to fix problems.
Also read:
- [Updated] In 2024, Anonymous Glimpse Into FB Flashbacks
- 2024 Approved Navigating Zoom with Skype A Guide to Seamless Video Calls
- A Comprehensive Guide to Securing Your Virtual Environment with Hyper-V Encryption: Differences Between Generation 1 and Generation 2 VMs
- Comprehensive Guide to Correcting iPhone Alarm Malfunctions
- Effective Ways to Prevent iPhone Application Crashes (9 Strategies Included)
- Guide to Quickly Toggle Off Sticky Keys Feature on Windows 11 - Illustrated Instructions Included
- Guide: Resolve the 'Final Text Line Missing' Problem in iPhone Apps
- In 2024, How Do I Stop Someone From Tracking My OnePlus 11 5G? | Dr.fone
- In 2024, The Art of Description Crafting Compelling Podcast Hooks
- Mastering Mobile Device Care with Apple's Support App on Your iPhone
- MP3形式で音楽を編集する - Windows 11標準メディアプレイヤー使用ガイド
- The Ultimate Guide How to Bypass Swipe Screen to Unlock on Infinix Hot 40 Pro Device
- Top 6 Solutions for Resolving Issues When Apple Rejects Your Card
- Title: Step-by-Step Guide: Performing a Complete iOS Device Restoration
- Author: Edward
- Created at : 2024-11-10 18:41:06
- Updated at : 2024-11-15 16:55:54
- Link: https://fox-that.techidaily.com/step-by-step-guide-performing-a-complete-ios-device-restoration/
- License: This work is licensed under CC BY-NC-SA 4.0.